How to Translate a Video Automatically
To translate a video with Maestra Studio, upload it in the Subtitle section with Translate to another language turned on, choose a target language, and select Submit. Maestra Studio transcribes the speech, translates it, and shows both versions in the editor so you can review them and export subtitles, a video with subtitles, or a transcript.
What you need before you start
- A Maestra Studio account that you are signed in to. If you do not have one, create a free account.
- A video or audio file, or a link to one.
- Enough credits for translation. Check the credits box at the bottom of the left sidebar. See Credits, Plans and Usage.
Translate while you upload
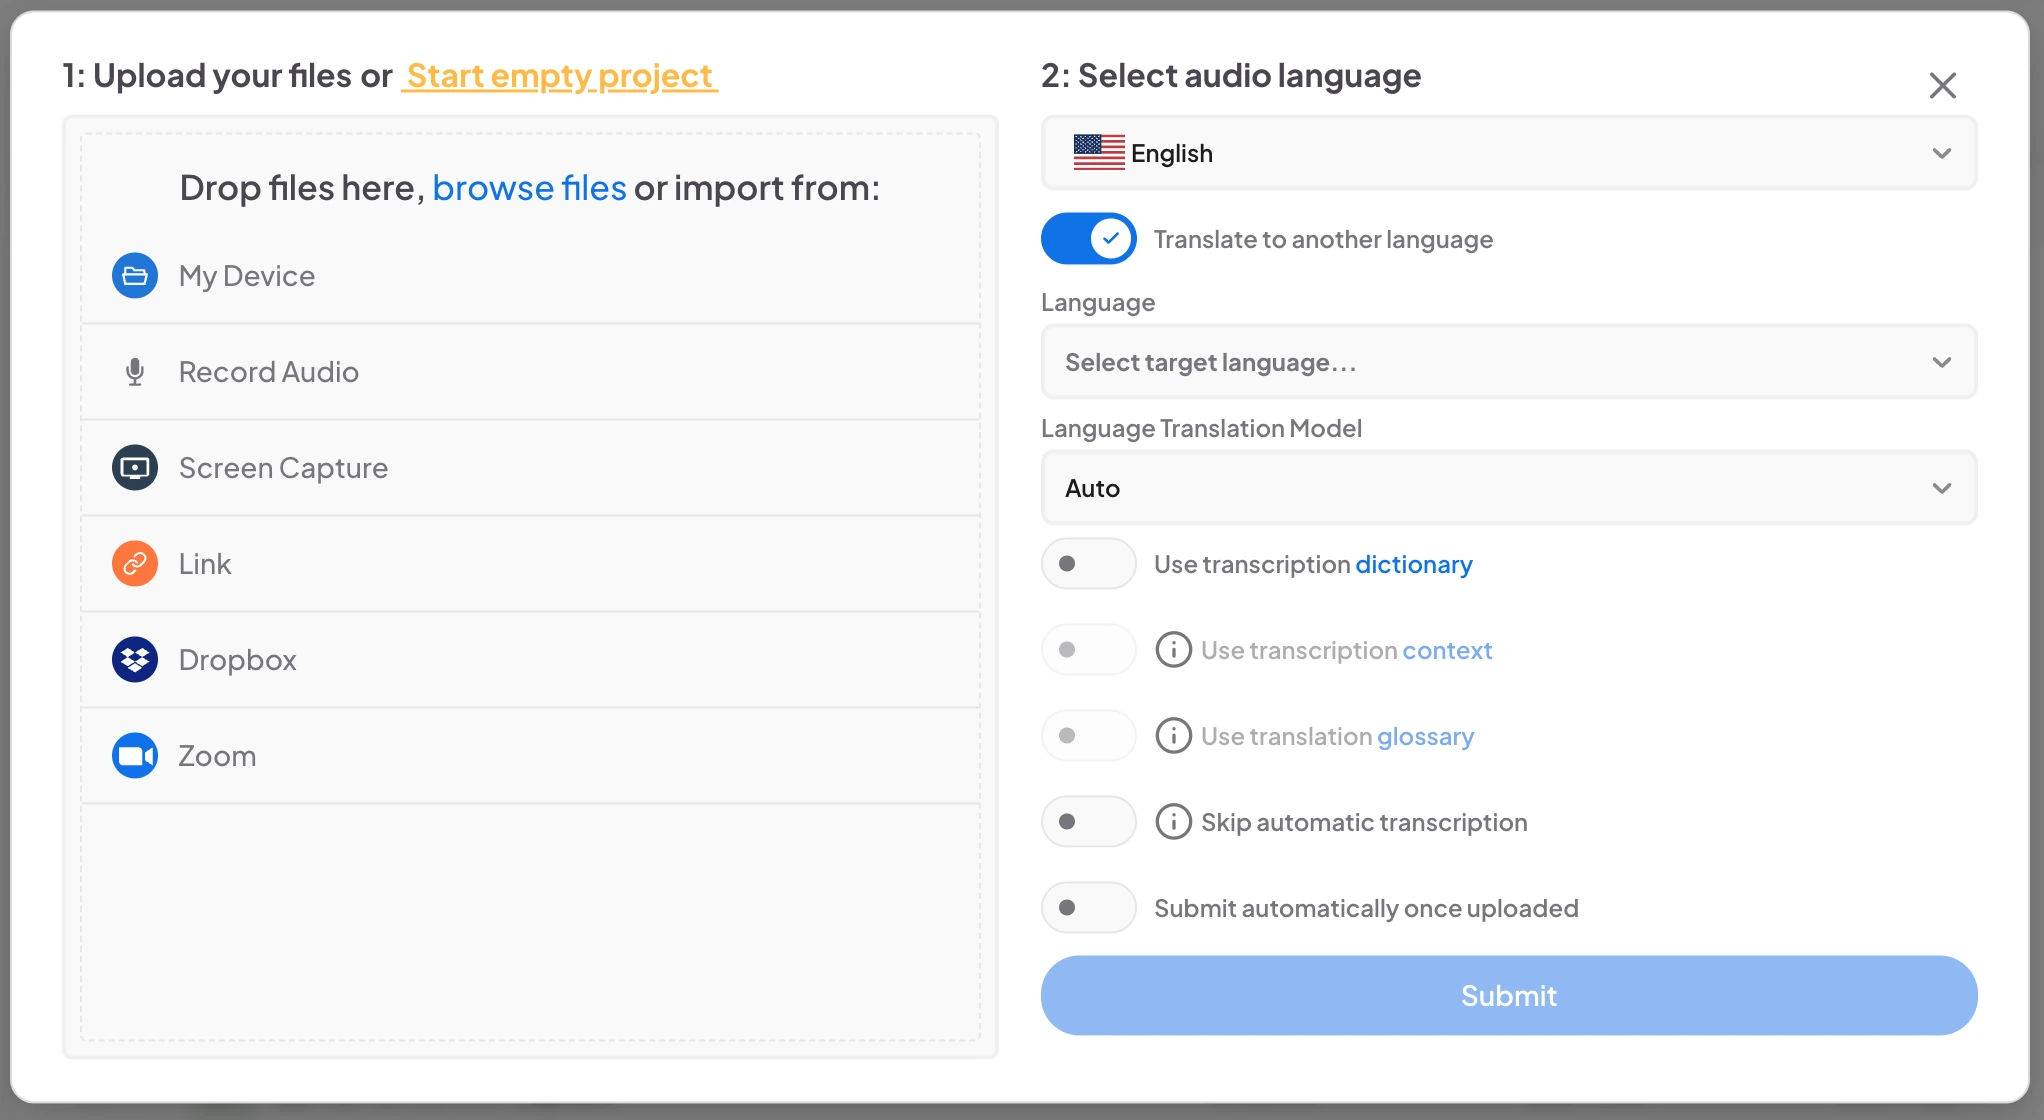
- In the left sidebar of app.maestra.ai, select Subtitle, then select New Subtitle at the top right.
- Add your file and choose the audio language (the language spoken in the video). For all the ways to add a file, see Upload a File and Create Subtitles.
- Turn on Translate to another language.
- Under Language, select the language you want to translate into. Language Translation Model is set to Auto.
- Select Submit.
Add more languages later
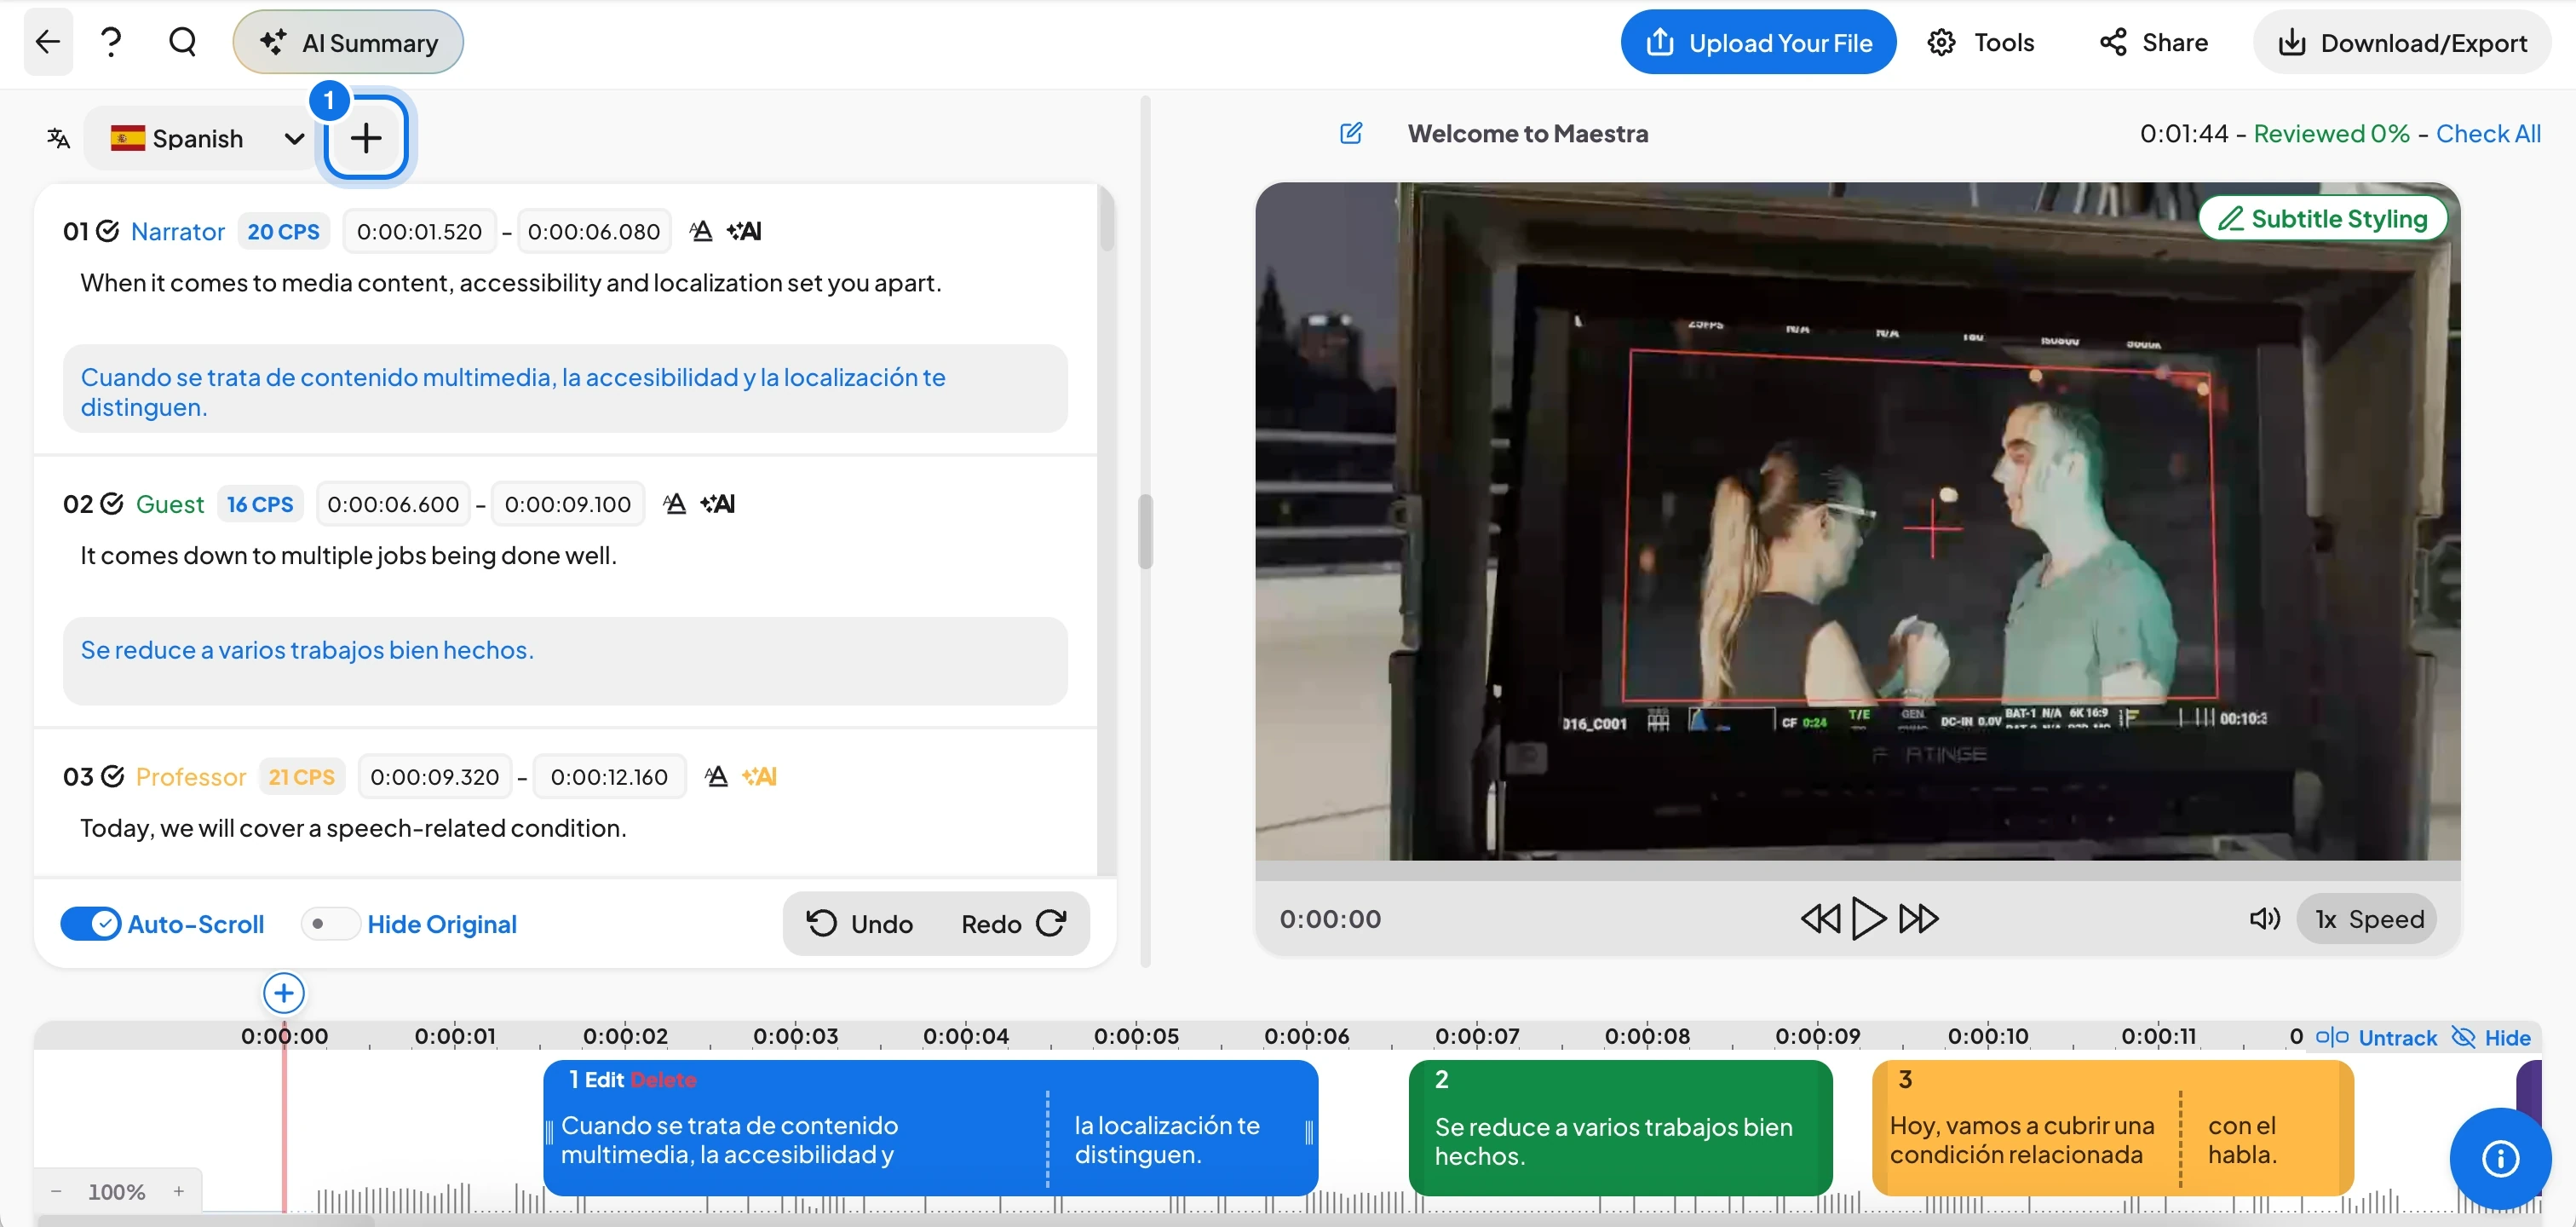
You can translate the same file into as many languages as you need. Open the file from the Subtitles list, then select the + button next to the language tabs at the top of the text panel (marked 1).
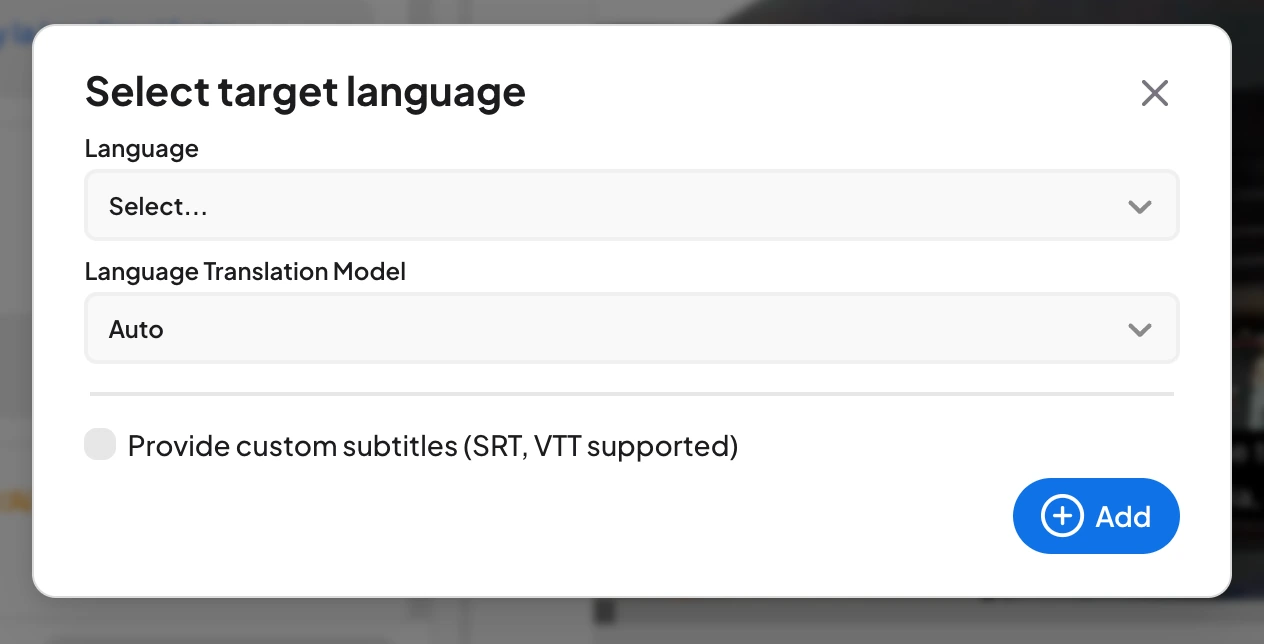
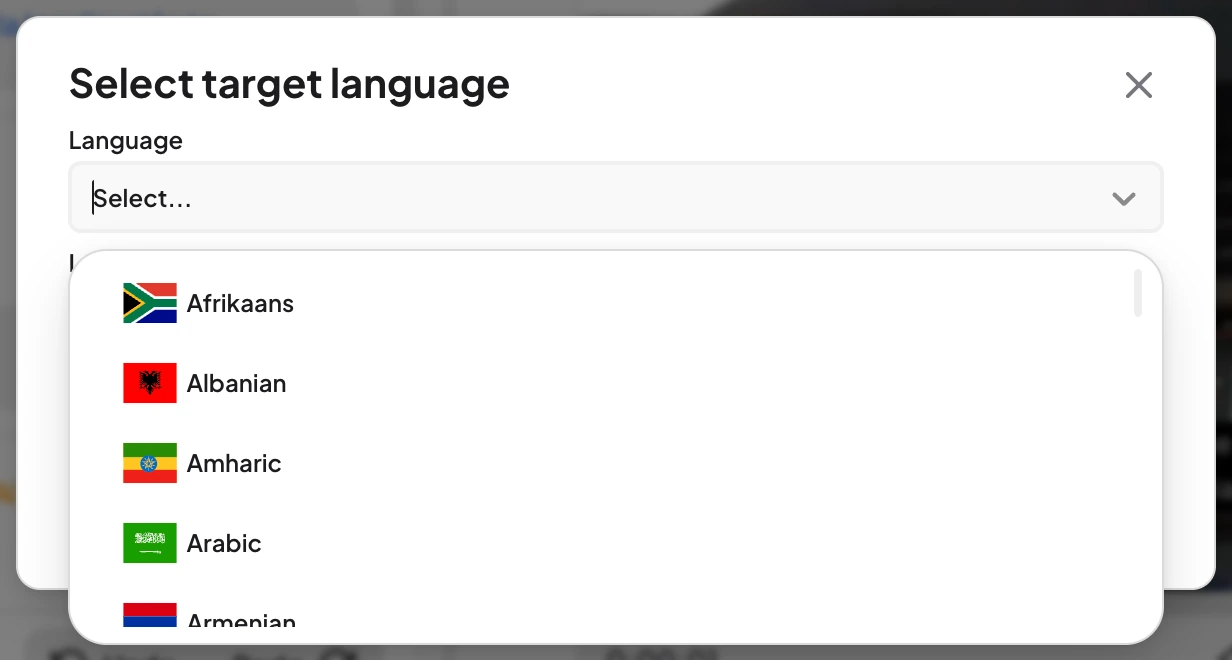
In the Select target language window, choose a Language and a Language Translation Model, then select Add. If you already have translated subtitles, turn on Provide custom subtitles (SRT, VTT supported) and upload them instead.
Review and edit the translation
Each language you add appears as a tab. Select a tab to switch between translations. The original text appears above each translated line, and you can edit either one. Turn on Hide Original to focus on the translation only. For a full tour of the editor, read Subtitle Editor.
Copy a translation into its own file
To keep a translation as a separate project, open Tools in the top bar and select Copy to New File. See Subtitle Editor for the rest of the Tools menu.
Export your translation
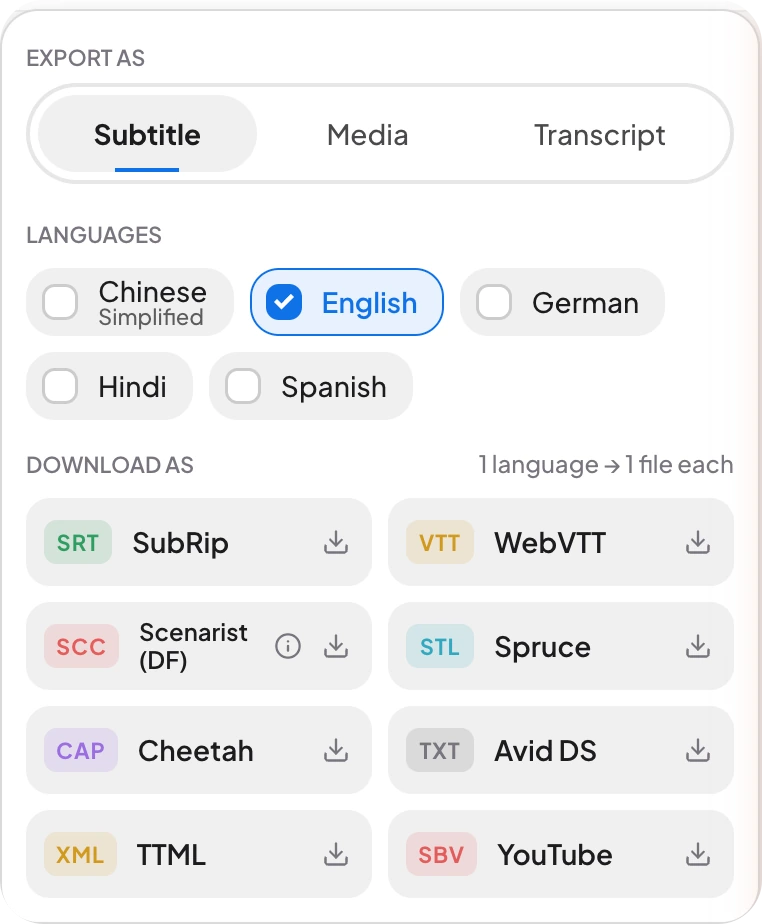
Select Download/Export at the top right of the editor. Under Subtitle, choose the languages and a format such as SRT or VTT. Under Media, select Export MP4 to download the video with subtitles in the language you choose. Under Transcript, download the translated text as TXT, Word, PDF, or JSON.
Frequently asked questions
Maestra Studio translates into more than 125 languages. Select any of them from the language list when you upload a file or add a language in the editor.
Yes. Add languages one at a time with the plus button in the editor. Each language gets its own tab, and you can export several languages at once.
Leave the Language Translation Model set to Auto unless you need a specific model. Auto picks the model for you.
Yes. Open Download/Export, choose the Media tab, select the subtitle language, and select Export MP4.
Yes. Add them with the Provide custom subtitles option in the Select target language window, or see the Subtitle Importing and Translation guide.