How to Edit Subtitles in the Maestra Studio Subtitle Editor
The Maestra Studio subtitle editor is where you correct subtitle text, adjust timing, review lines, add translations, style how subtitles look, and export them. Open any file from the Subtitle list to start. This guide explains every button and menu on the screen.
What you need before you start
- A Maestra Studio account. If you do not have one, create a free account.
- A subtitle file with the status Ready. See Upload a File and Create Subtitles.
Know the editor layout
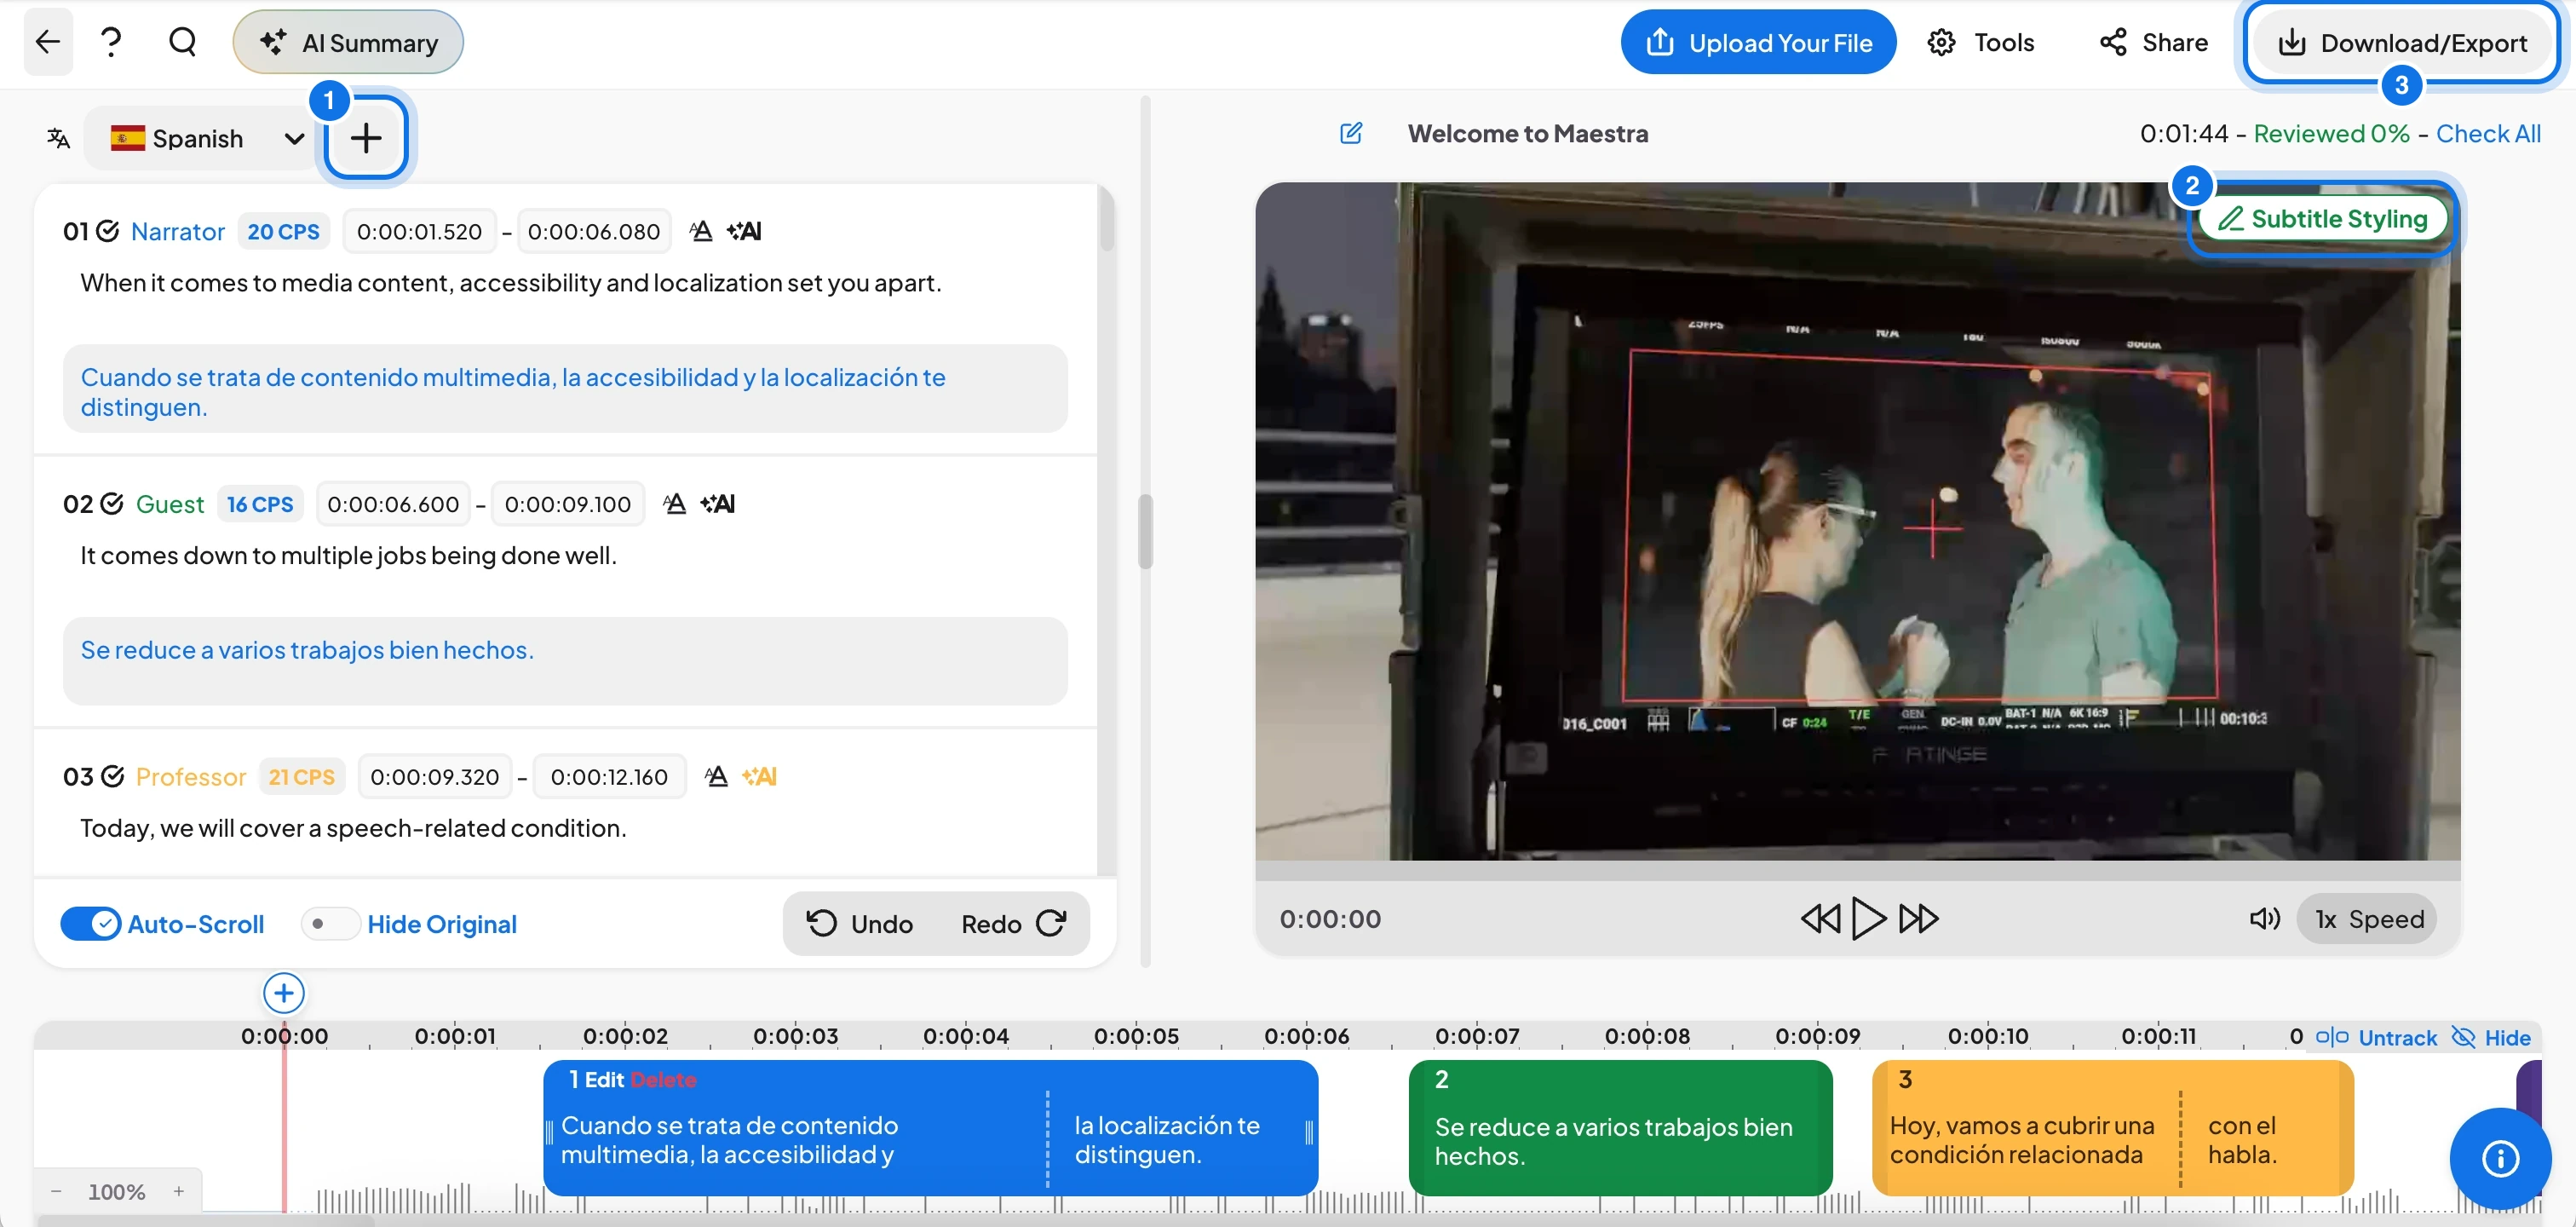
The numbered markers point to three controls this guide uses later:
- 1: the + button, which adds a language
- 2: Subtitle Styling, which opens the style settings
- 3: Download/Export, which opens the export panel
The screen has four areas:
- Top bar: file-wide tools such as help, search, AI Summary, Tools, Share and export.
- Text panel (left): every subtitle line, with the language tabs above it.
- Video player (right): a preview of your subtitles on the video.
- Timeline (bottom): one block for each subtitle, next to the audio waveform.
Use the top bar
From left to right, the top bar has these controls.
- Back arrow: returns you to the Subtitle list.
- ? (help): opens the Keyboard Shortcuts panel and Help and Tips. See Keyboard Shortcuts.
- Search icon: opens a find and replace bar (see the next section).
- AI Summary: creates a written summary of the file. See AI Summary.
- Upload Your File: opens the upload window so you can add another file.
- Tools: opens a menu of file actions (see the Tools menu section below).
- Share: invites people to the file or gives you an embed code. See Share and Embed.
- Download/Export: opens the export panel (see the export section).
Find and replace text
Select the search icon, or press ⌘ + F, to open the bar.
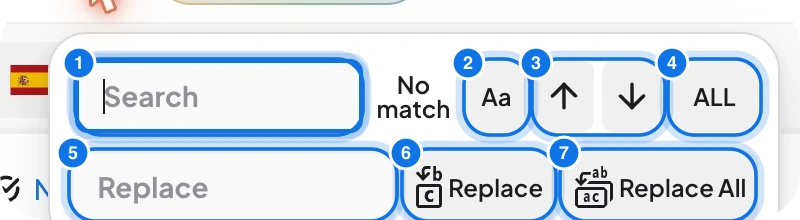
- Search (marked 1): type the text to find. The number beside the field shows how many matches there are, or No match.
- Aa (marked 2): switches case-sensitive search on or off.
- Up and down arrows (marked 3): jump to the previous or next match.
- Scope button (marked 4, it shows ALL by default): switches between searching all languages, only the original language, or only the translation. Hover over it to see which one is active.
- Replace field (marked 5): type the new text here.
- Replace (marked 6): replaces the current match.
- Replace All (marked 7): replaces every match.
Work with subtitle lines
Each line in the text panel has the same controls.
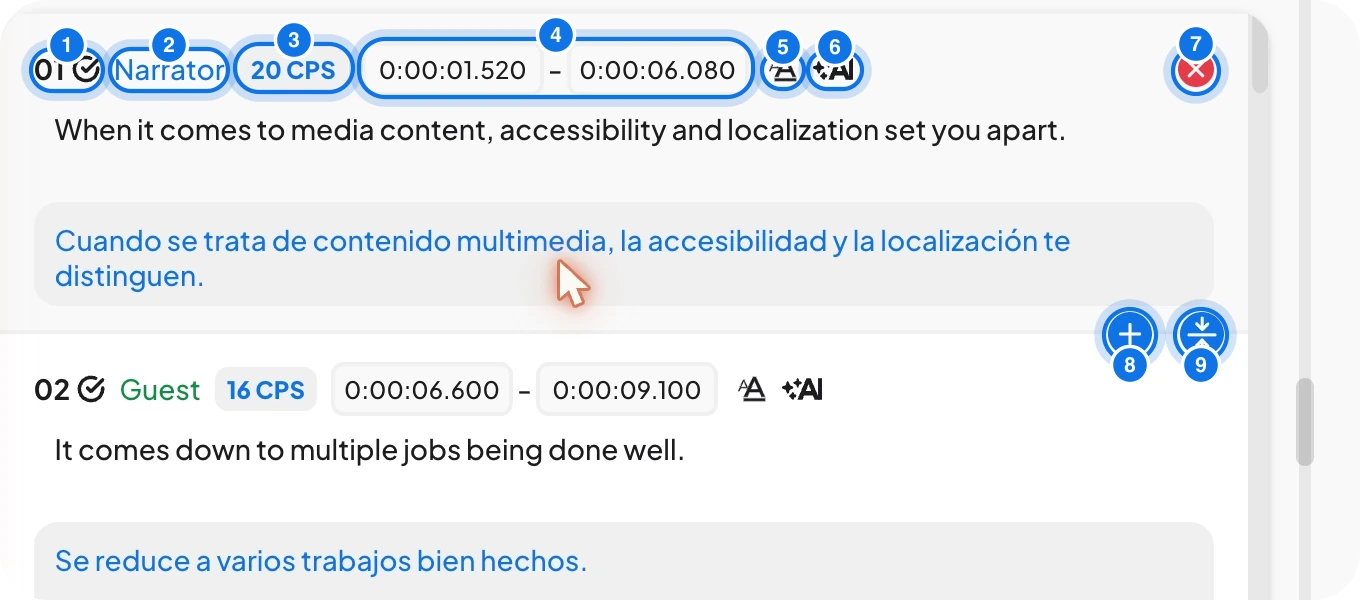
- Line number and check mark (marked 1): select the check mark to mark the line as reviewed. It turns green. Select it again to undo. The Reviewed percentage above the video player counts the reviewed lines.
- Speaker name (marked 2): shows who is speaking. Each speaker has a color, and the same color is used for that speaker's blocks on the timeline.
- CPS badge (marked 3): characters per second. It shows how fast viewers must read the line. A high number means the line has many characters for its duration, so shorten the text or lengthen the time.
- Start and end times (marked 4): the two time fields hold when the line appears and disappears. Click a field to change it.
- A icon, Style Single Subtitle (marked 5): styles this one subtitle instead of the whole file.
- +AI icon, Generate Sentence Alternatives (marked 6): asks AI for other wordings of the line, which helps when a line is too fast to read.
- Red X, delete (marked 7): appears at the right end when you hover over a line. It removes the line.
- Blue + (add) (marked 8): appears between two lines when you hover. It adds a new line there.
- Blue merge button (marked 9): appears between two lines when you hover. It merges the highlighted sentences into one.
- Text boxes: the original text is on top. A translation, if you have added one, is below in blue. Edit either box. To split a sentence, click where you want the split and press Enter.
When you edit a translated sentence by hand, it becomes locked so automatic translation does not overwrite it. Press ⌘ + L to lock or unlock it.
Use the controls under the text panel
- Auto-Scroll: keeps the list in step with the video as it plays.
- Hide Original: shows only the translated text.
- Undo and Redo: step back or forward through your edits.
Switch and add languages
The language tab above the text panel shows the language you are editing. Open its menu to switch languages. A star marks the original language of the file.
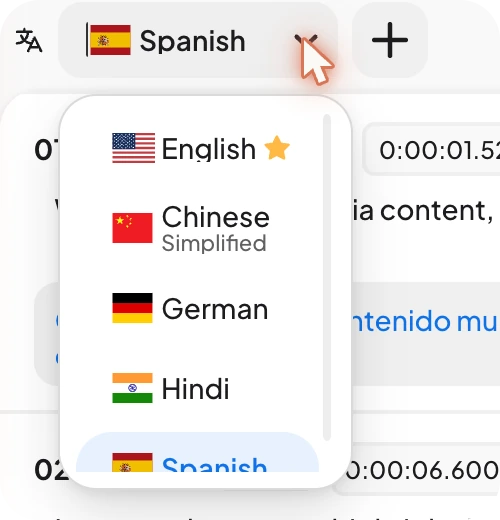
Select the + button next to the tab (marked 1 in the first screenshot) to add a language. See How to Translate a Video Automatically.
Use the video player
- File name and pencil icon: the pencil lets you rename the file. When your list has neighbouring files, arrows next to the name take you to the previous or next file.
- Reviewed and Check All: the percentage shows how much of the file you have reviewed. Check All marks every line as reviewed.
- Subtitle Styling: opens Format Subtitles (see the next section).
- Volume icon: mutes or unmutes. The shortcut is ⌘ + M.
- Rewind, play and fast-forward: the three controls in the middle move through the video. Press Tab to play or pause.
- Speed: choose 0.5×, 0.75×, 1×, 1.25×, 1.5×, 1.75× or 2×.
Style your subtitles
Select Subtitle Styling (marked 2) on the video player to open Format Subtitles. Changes apply to all subtitles in the file.
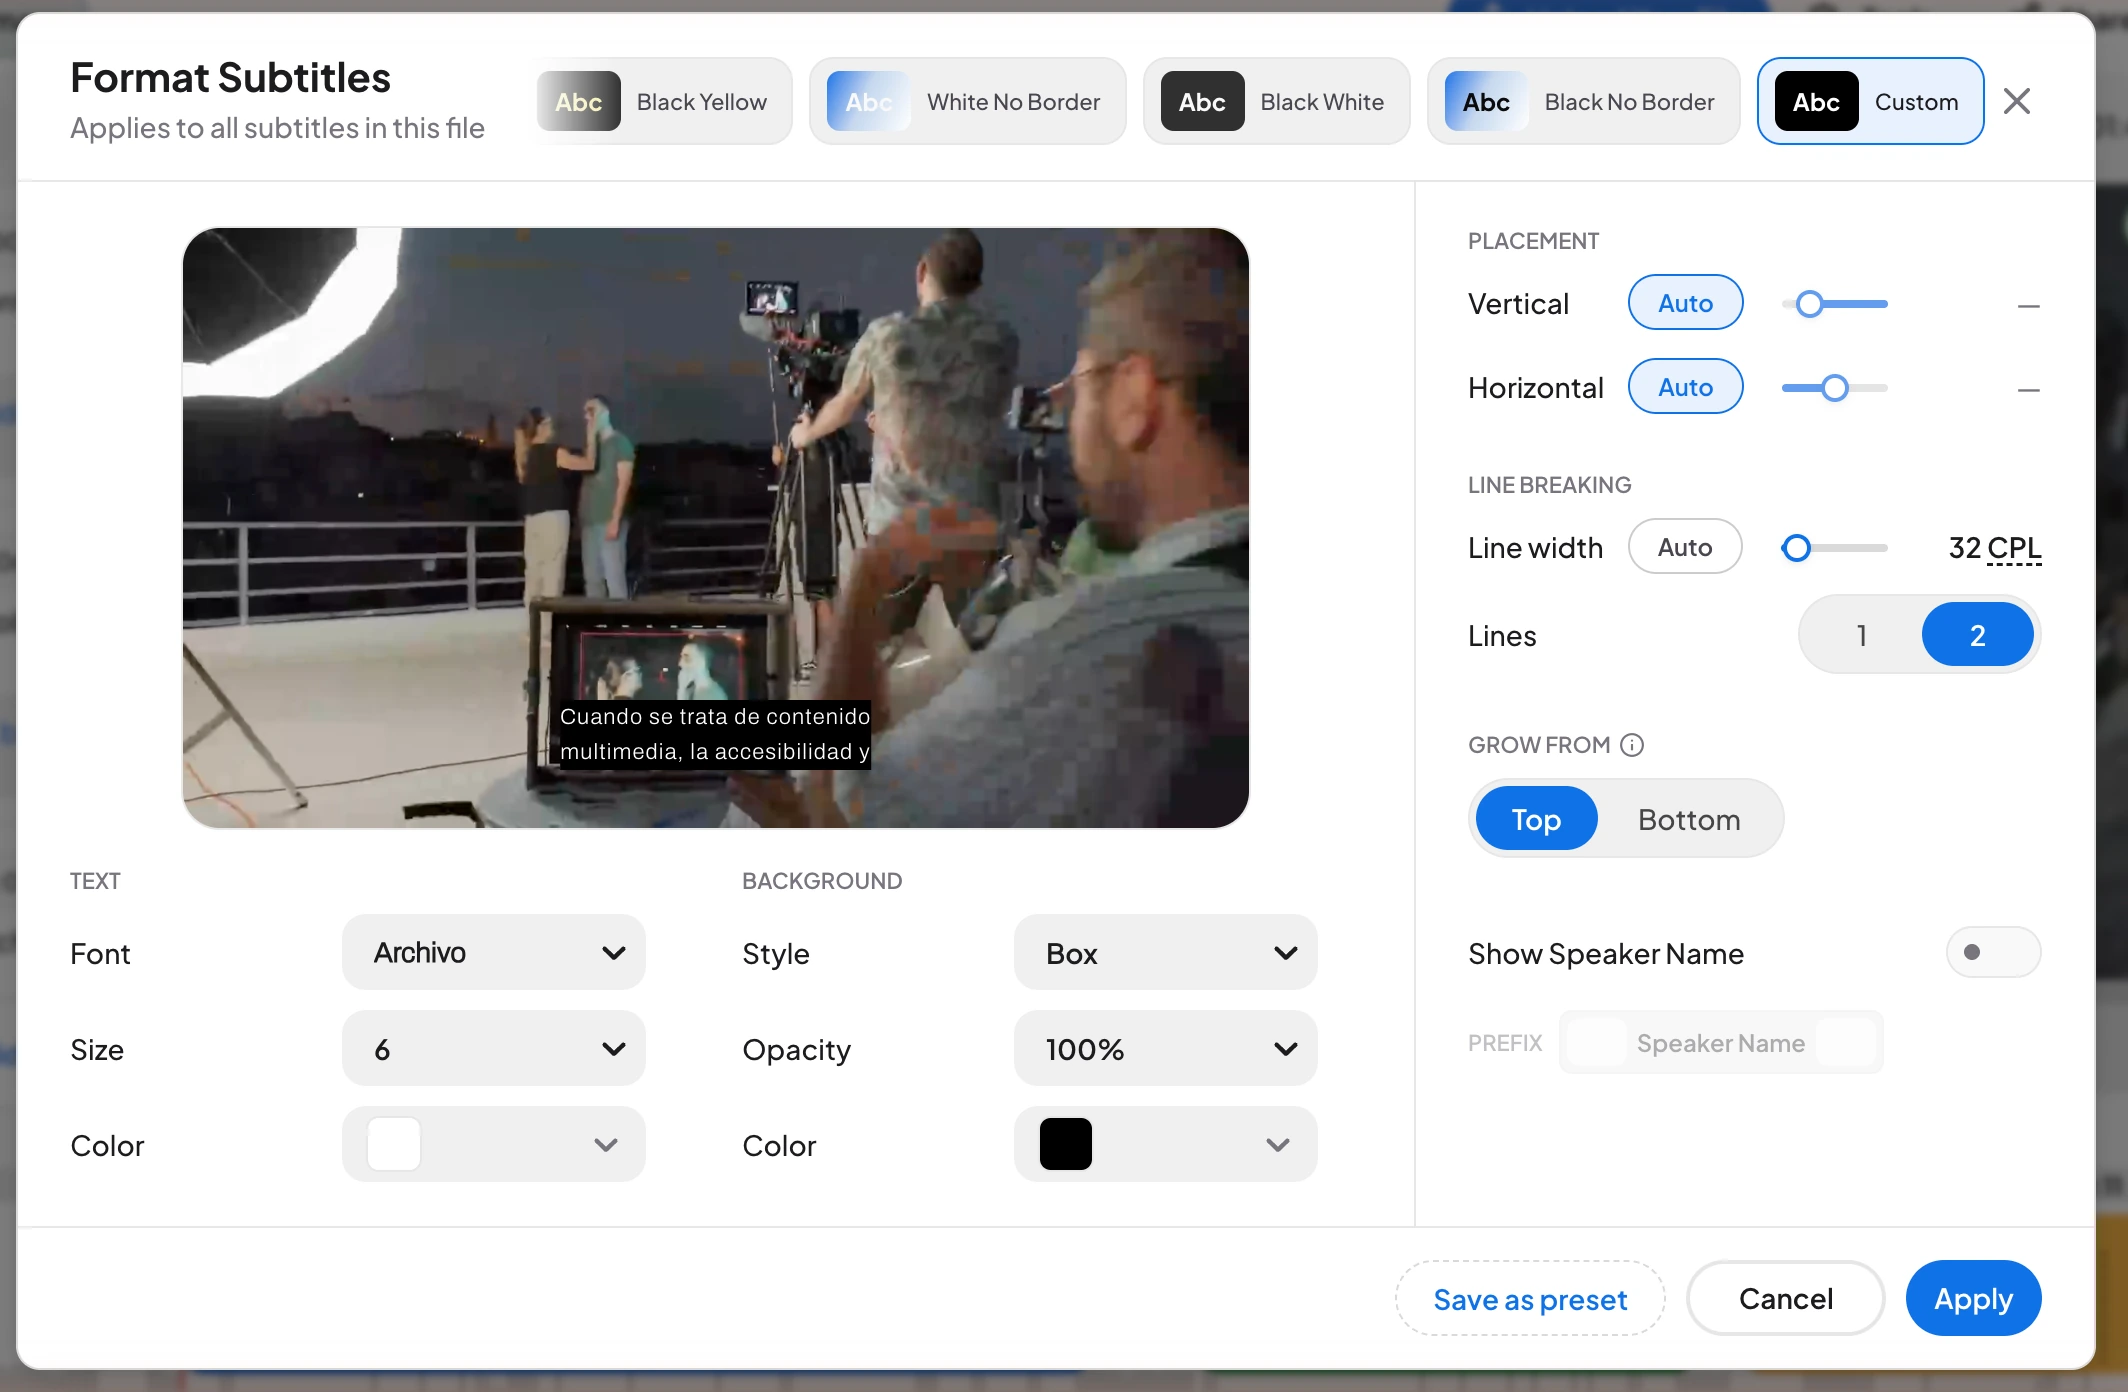
- Presets: choose Black Yellow, White No Border, Black White, Black No Border, or Custom.
- Text: set the font, size, and color.
- Background: set the style, opacity, and color.
- Placement: keep Auto or set the vertical and horizontal position.
- Line breaking: set the line width in characters per line (CPL) and choose 1 or 2 lines.
- Grow from: choose whether subtitles grow from the top or the bottom.
- Show Speaker Name: add speaker names to the subtitles, with an optional prefix.
Select Save as preset to reuse your settings, then Apply. To make a preset your default, see Account Settings.
Use the timeline
The timeline shows each subtitle as a colored block above the audio waveform. Use the zoom control at its bottom left to see more or less of the video, and Hide at its right to collapse it. Untrack at its right controls whether the timeline follows the video (see the timeline guide). See Adjusting Subtitle Timing with the Timeline for every control.
Use the Tools menu
Select Tools in the top bar to open the menu.
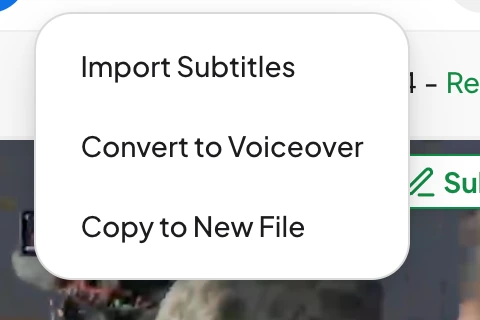
- Import Subtitles: brings in a subtitle file you already have. See Subtitle Importing and Translation.
- Convert to Voiceover: opens the same file in the voiceover editor with its text already in place, so you can assign voices and select AI Dubbing. Nothing is dubbed until you select AI Dubbing. See Upload a File and Create an AI Voiceover.
- Copy to New File: saves a copy of your work in a new file.
Export your subtitles
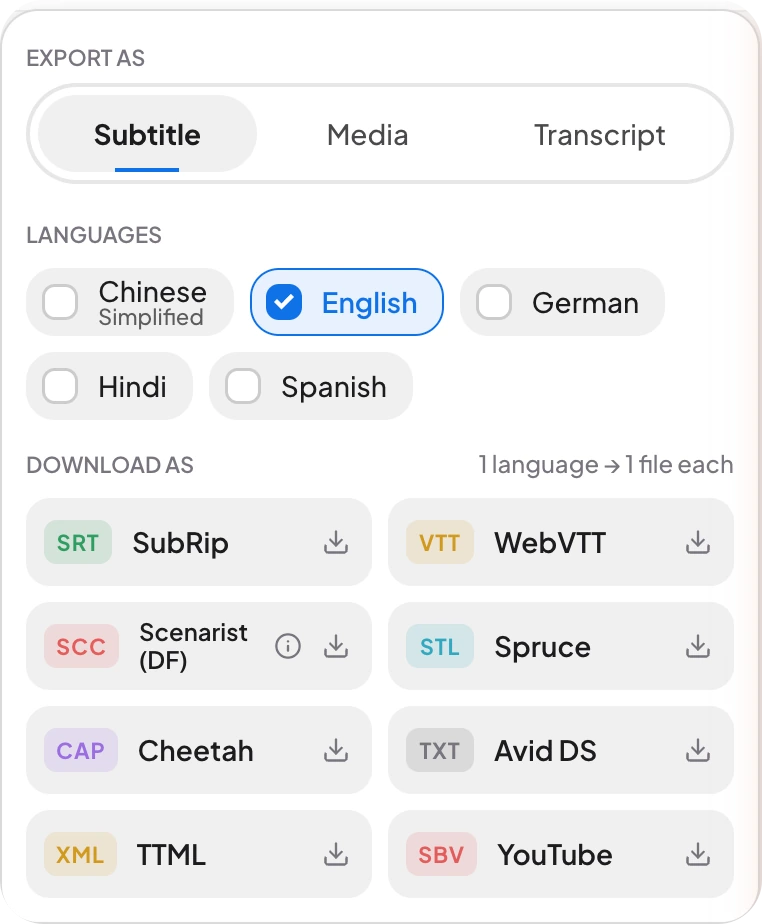
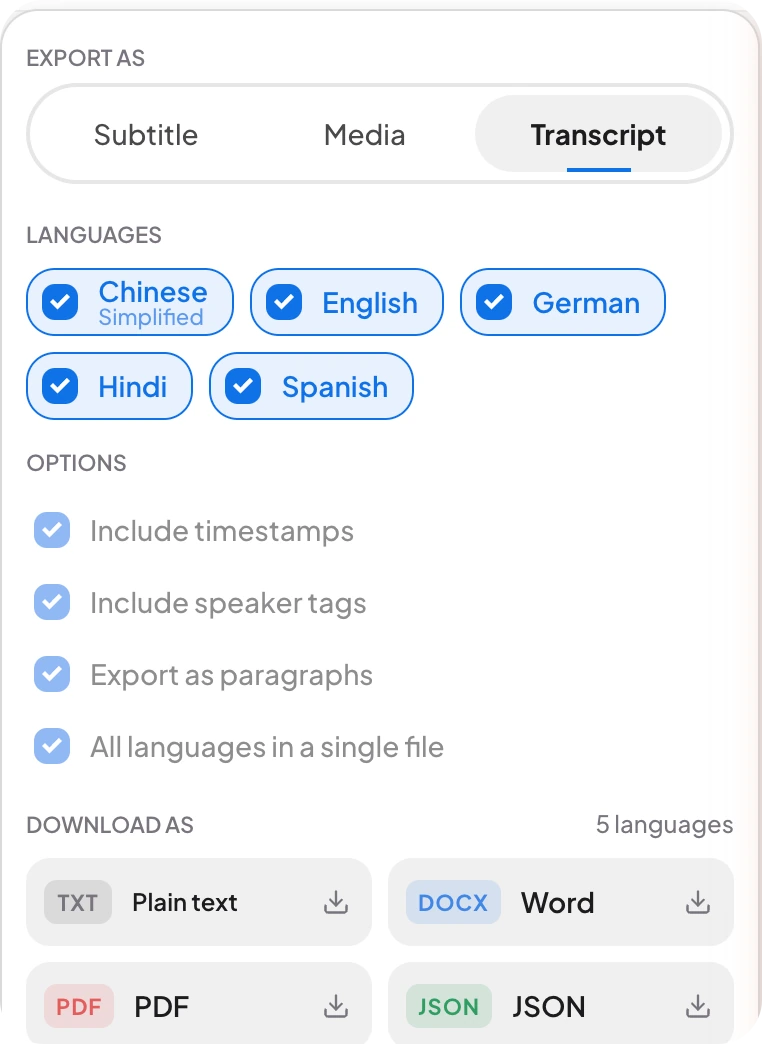
Select Download/Export (marked 3) at the top right. The panel has three tabs.
Subtitle
Choose one or more languages, then download in a format such as SubRip (SRT), WebVTT, Scenarist, Spruce (STL), Cheetah (CAP), Avid DS, TTML, or YouTube (SBV).
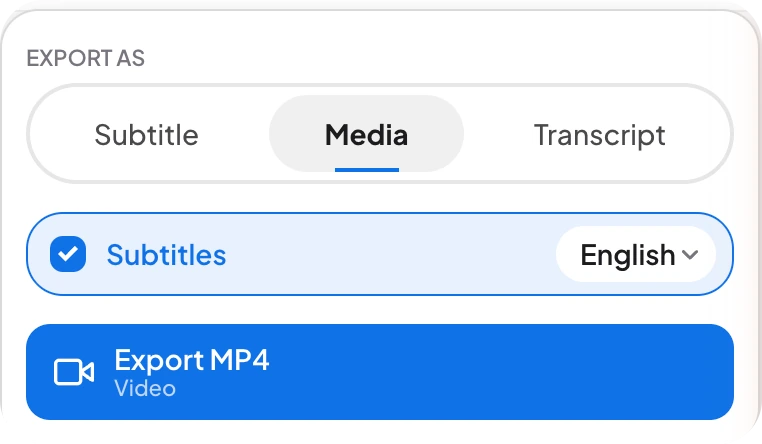
Media
Turn on Subtitles, pick the language, and select Export MP4 to download the video with subtitles.
Transcript
Choose the languages and options (timestamps, speaker tags, paragraphs, and all languages in a single file), then download as plain text, Word, PDF, or JSON.
Frequently asked questions
Check the CPS badge on the line. A high number means the line is read quickly, so shorten the text or increase the time between the start and end. The +AI icon can suggest other wordings.
Select the check mark next to the line number. Select Check All above the video player to mark every line.
Yes. Use the scope button in the search bar to search all languages, only the original language, or only the translation.
Open Tools and choose Copy to New File.
Maestra Studio exports SubRip (SRT), WebVTT, Scenarist, Spruce (STL), Cheetah (CAP), Avid DS, TTML, and YouTube (SBV).
Open Download/Export, choose the Media tab, select the subtitle language, and select Export MP4.