How to Upload a File and Create an AI Voiceover
To create an AI voiceover in Maestra Studio, open Voiceover in the left sidebar of app.maestra.ai, select New Voiceover, add your file, choose the original language and the language for the voiceover, and select Submit. When processing finishes, open the file, choose voices, and select AI Dubbing to generate the audio.
What you need before you start
- A Maestra Studio account that you are signed in to. If you do not have one, create a free account.
- A video or audio file on your device, a link to one, or a recording you make inside Maestra Studio.
- Enough credits for the work. Your balance is in the credits box at the bottom of the left sidebar. See Credits, Plans and Usage.
Upload a file and start a voiceover
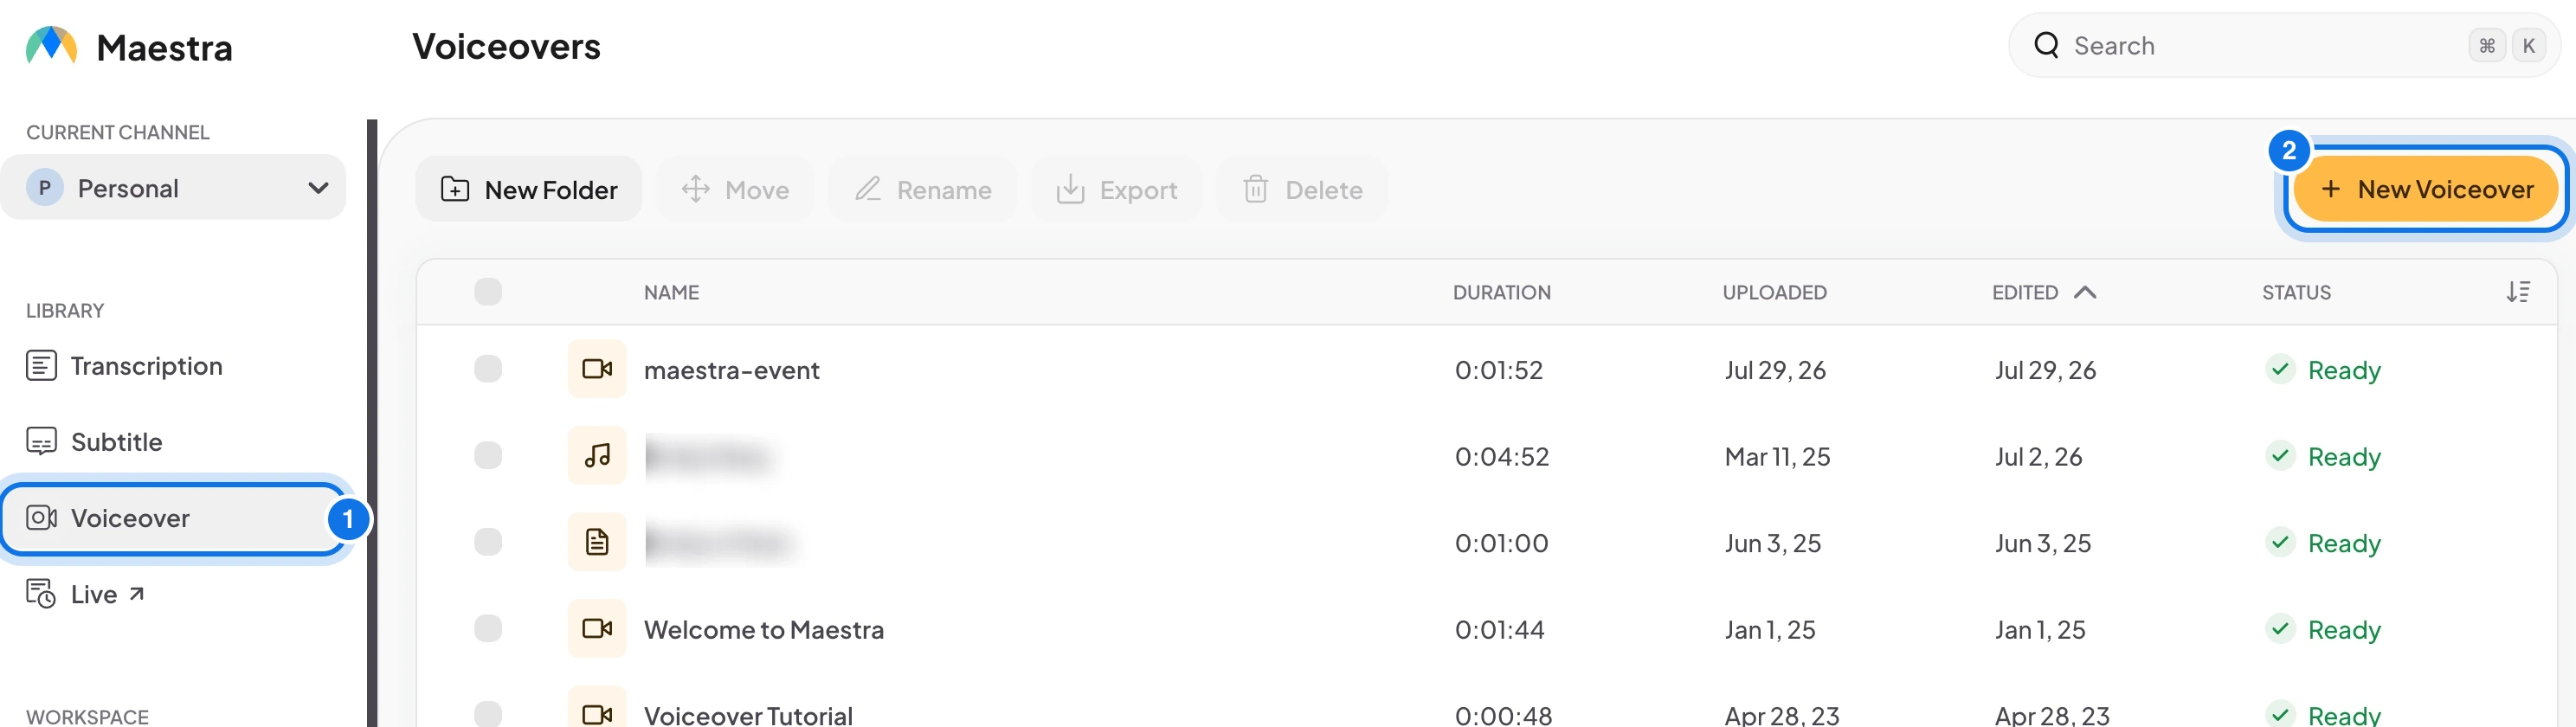
- In the left sidebar, under Library, select Voiceover (marked 1 in the screenshot below). Your existing voiceover projects appear in the list.
- Select New Voiceover at the top right of the page (marked 2). The upload window opens.
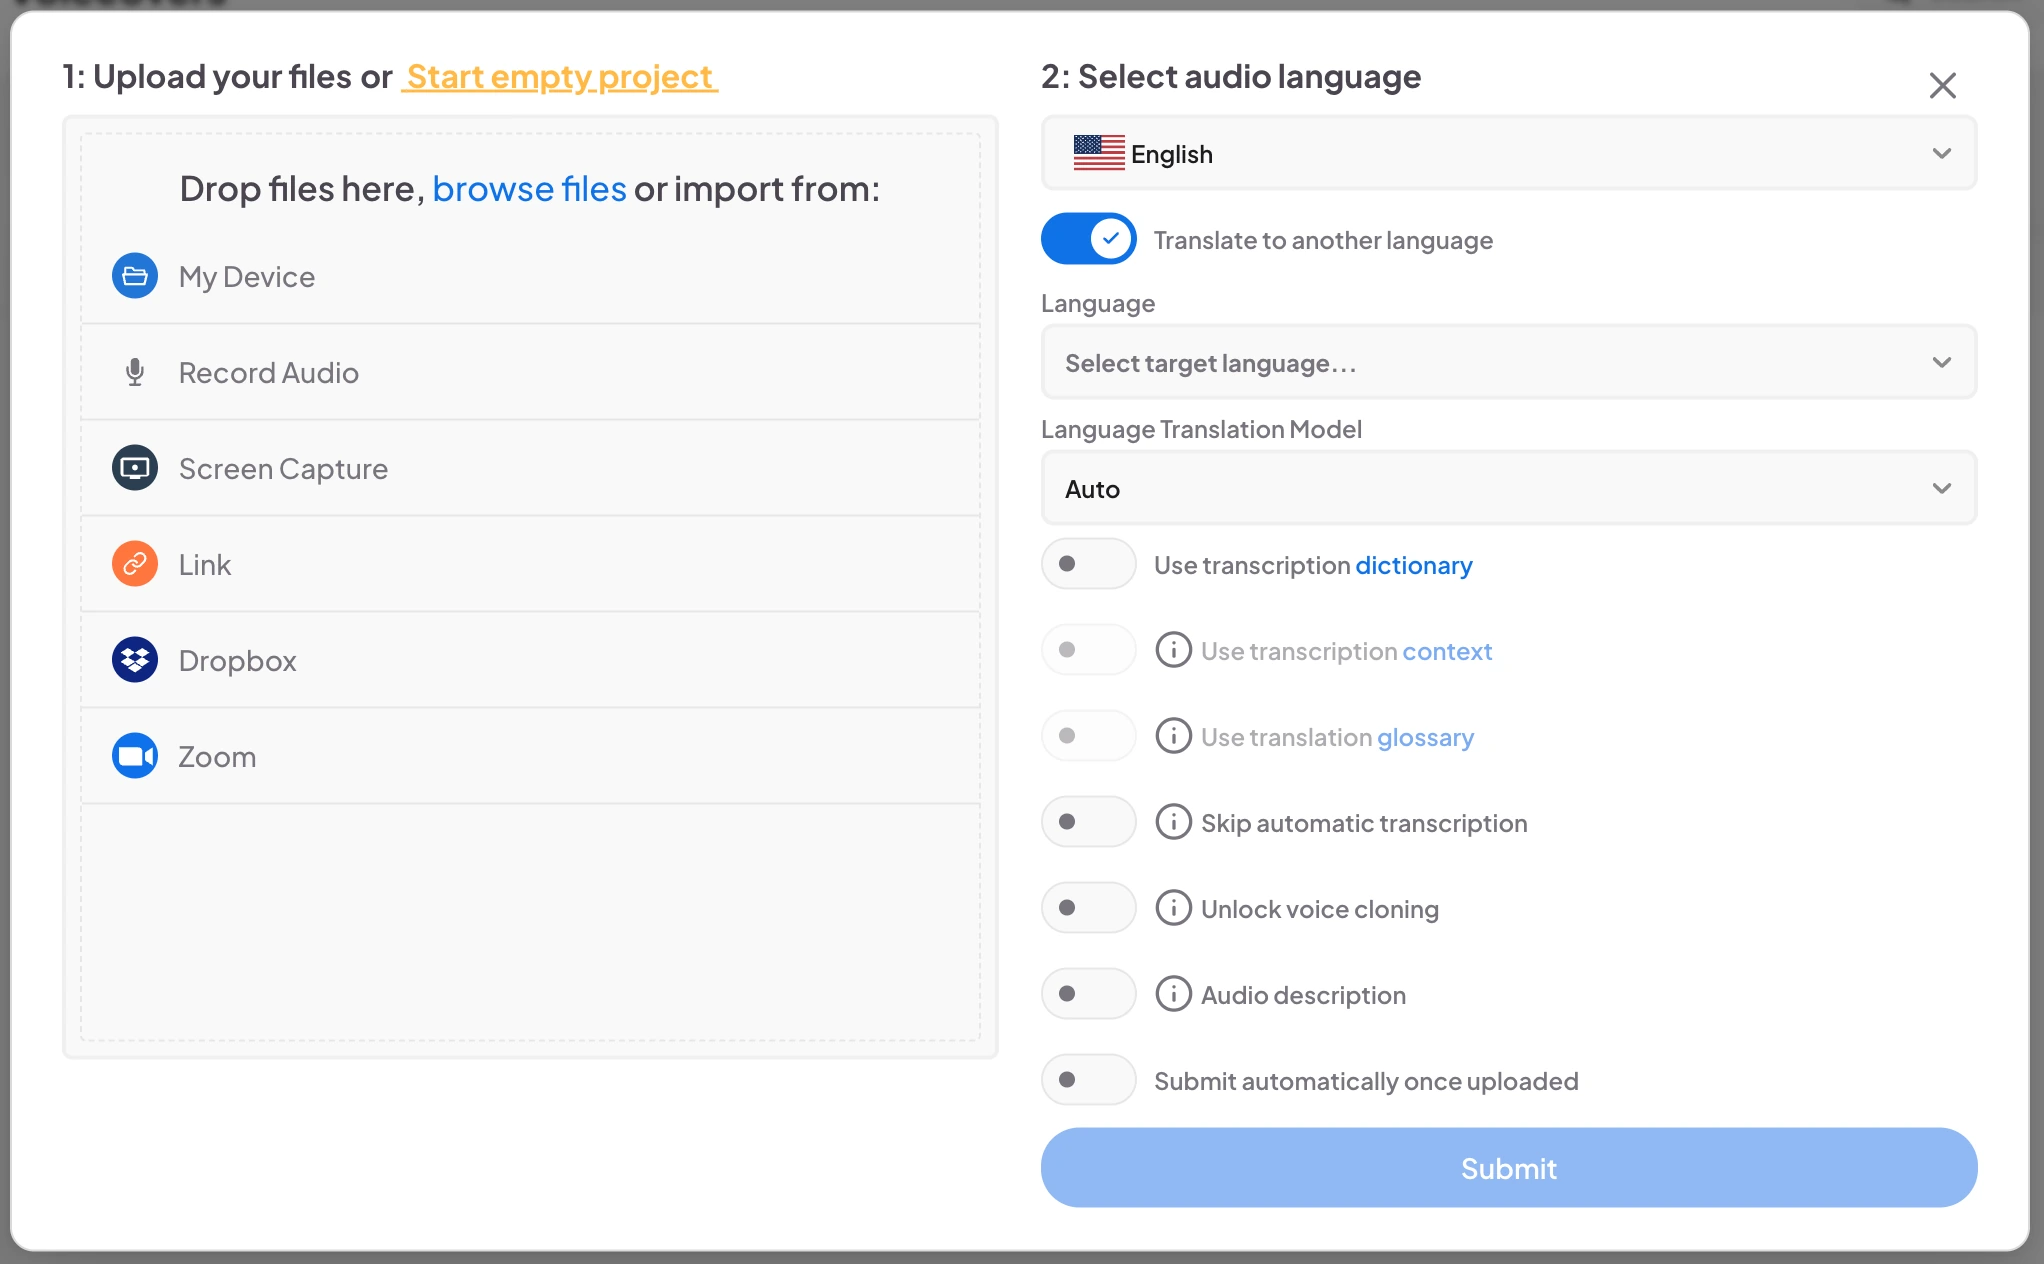
- Add your media in any of these ways:
- 3.1 Drag and drop a file into the window.
- 3.2 Select browse files.
- 3.3 Import from My Device, Record Audio, Screen Capture, Link, Dropbox, or Zoom.
- 3.4 Select Start empty project to begin without a file.
- Under Select audio language, choose the language spoken in your file.
- Turn on Translate to another language and select the language you want for the voiceover. The window opens with this option on, and you can choose a translation model (Auto by default).
- Choose your other settings (see the next section), then select Submit.
Choose your upload settings
- Use transcription dictionary: apply one of your custom dictionaries so names and specialized terms are transcribed correctly.
- Use transcription context: available when Soniox is selected as your transcription model in Settings.
- Use translation glossary: translate with DeepL and set the target language for glossary use.
- Skip automatic transcription: choose this option to upload your own subtitle file (SRT or VTT) instead of generating a transcript.
- Unlock voice cloning: turn this on if you plan to clone a speaker's voice for this file. See Voice Cloning.
- Audio description: automatically adds audio descriptions. This works for video files only and costs 10 additional credits per minute.
- Submit automatically once uploaded: starts processing as soon as the upload finishes. If it is off, select Submit yourself when the upload is complete.
Generate the voiceover
When processing finishes, the file's status in the Voiceovers list changes to Ready. Select the file to open the voiceover editor. Select Voices (marked 1) to choose a voice for each speaker, then select AI Dubbing (marked 2) to generate the voiceover. Each line has a play button so you can preview it, and the Source Volume and Voiceover/Dub Volume sliders balance the original audio against the new voice.
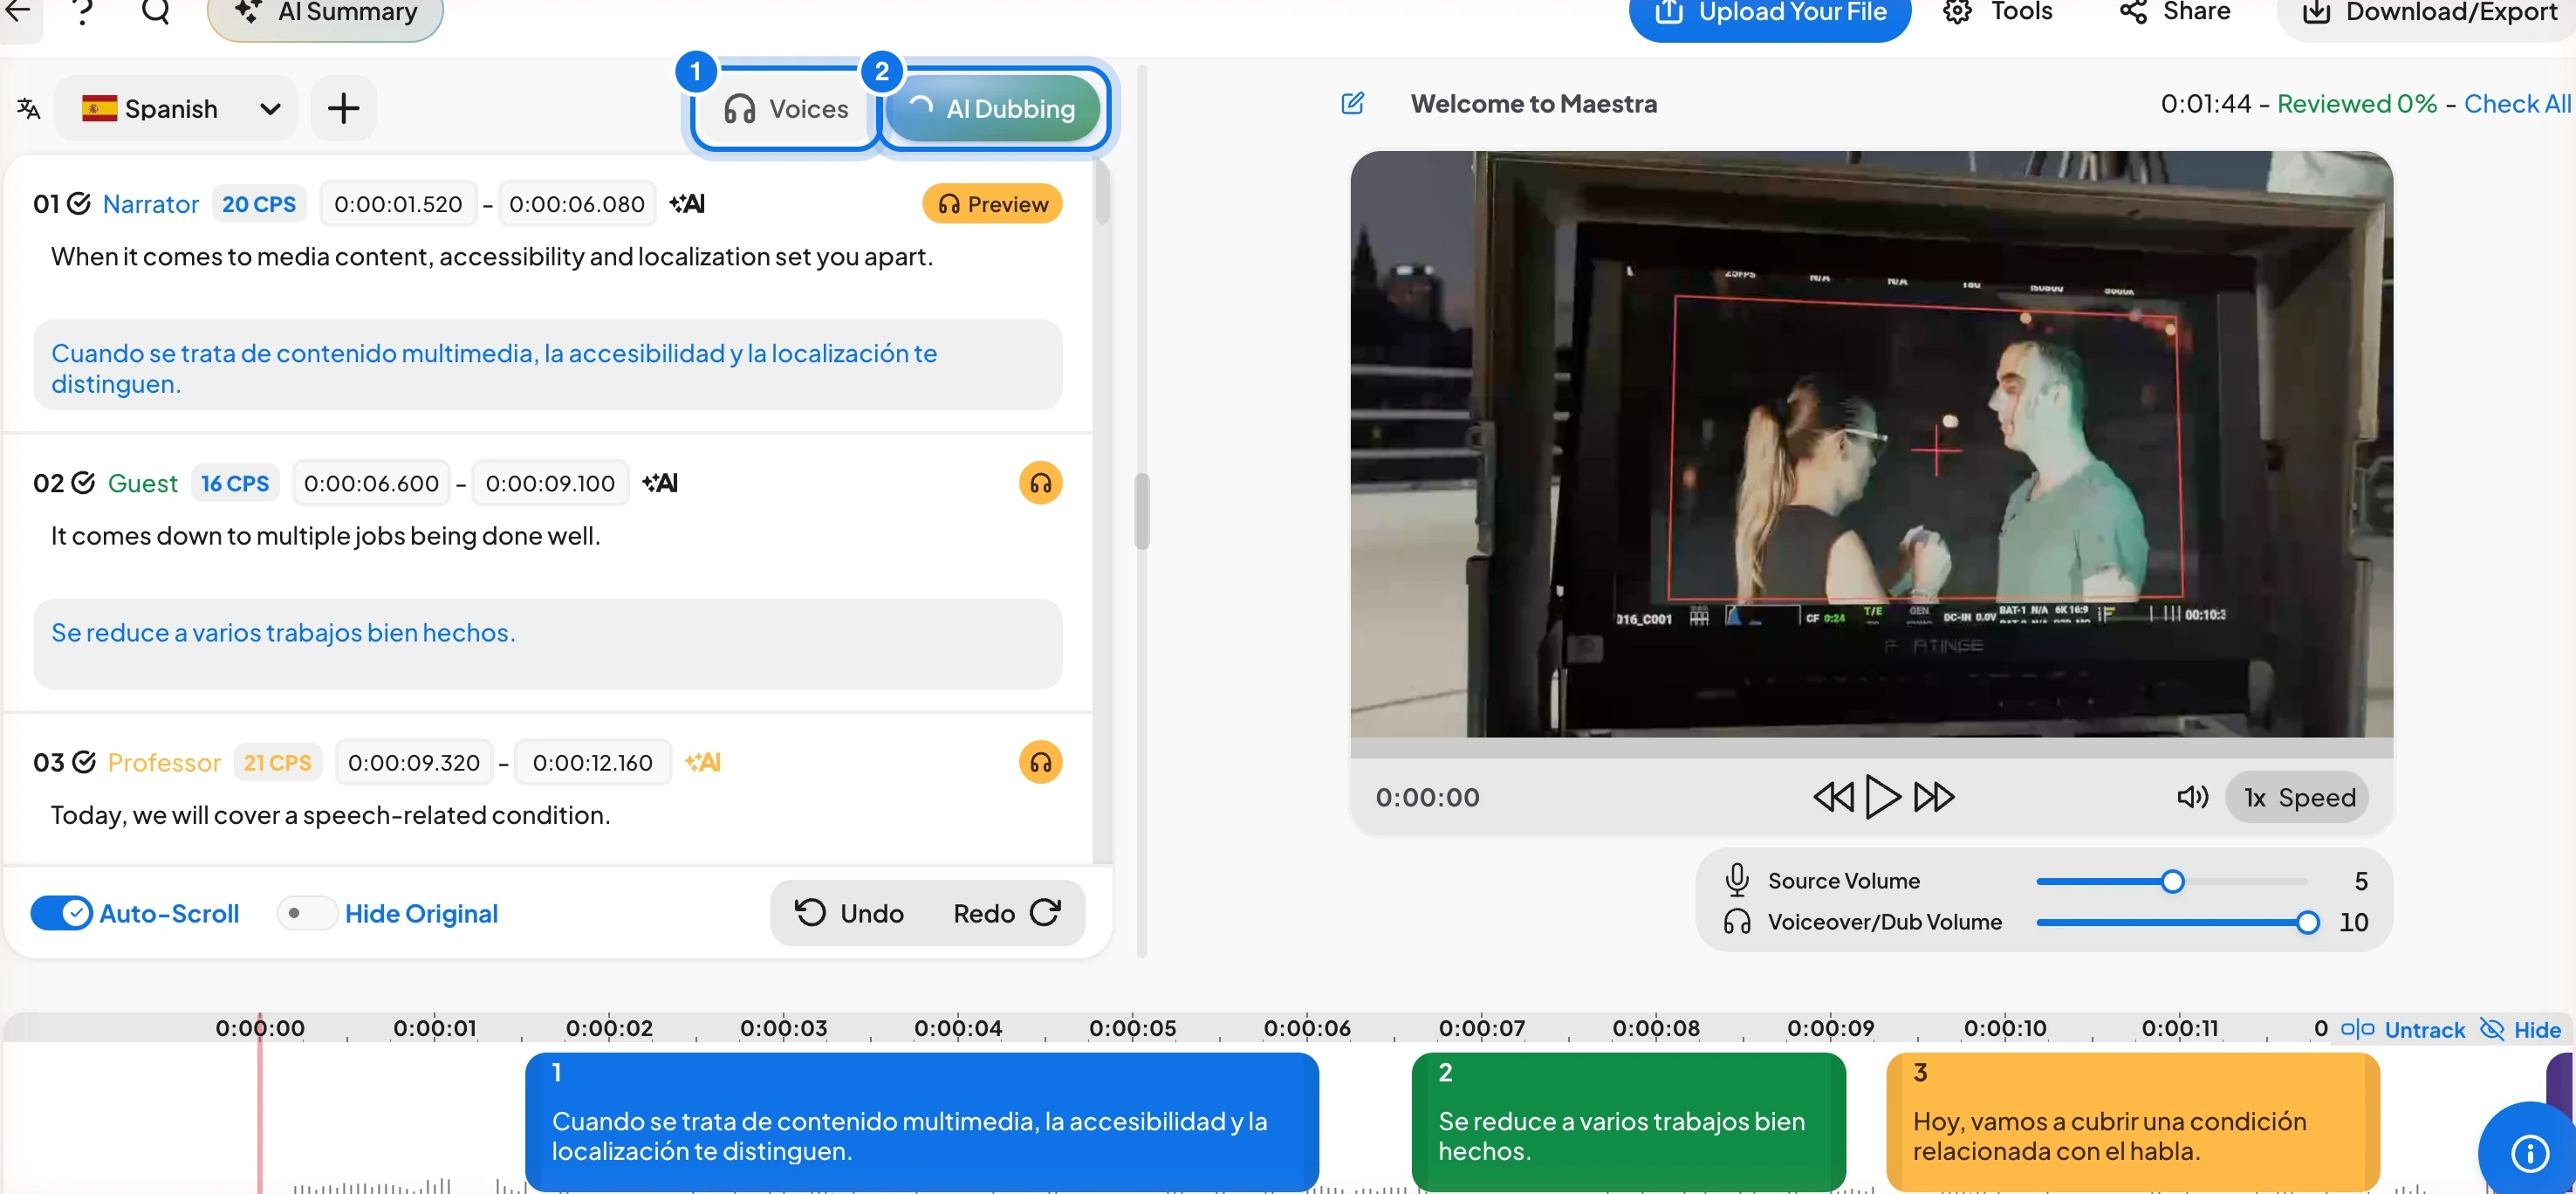
To learn what each tool does, read Voiceover Editor. When you are happy with the result, select Download/Export at the top right of the editor.
Frequently asked questions
Yes. Select Voices in the voiceover editor and choose a voice for each speaker in your file.
Yes. Turn on Unlock voice cloning when you upload, or open the voice options in the editor. The Voice Cloning guide walks through the steps.
It automatically adds audio descriptions to the voiceover. It works for video files only and costs 10 additional credits per minute.
The original audio stays in the project. Use the Source Volume and Voiceover/Dub Volume sliders in the editor to set how loud each one plays.
In the Voiceover list under Library. The status shows Ready when processing is complete. Select the file to open it in the editor.