How to Upload a File and Get a Transcript
To transcribe a file in Maestra Studio, open Transcription in the left sidebar of app.maestra.ai, select New Transcription, add your audio or video, choose the audio language, and select Submit. When processing finishes, open the file to read and edit the transcript.
What you need before you start
- A Maestra Studio account that you are signed in to. If you do not have one, create a free account.
- A video or audio file on your device, a link to one, or a recording you make inside Maestra Studio.
- Enough credits for the work. Your balance is in the credits box at the bottom of the left sidebar. See Credits, Plans and Usage.
Upload a file and create a transcript
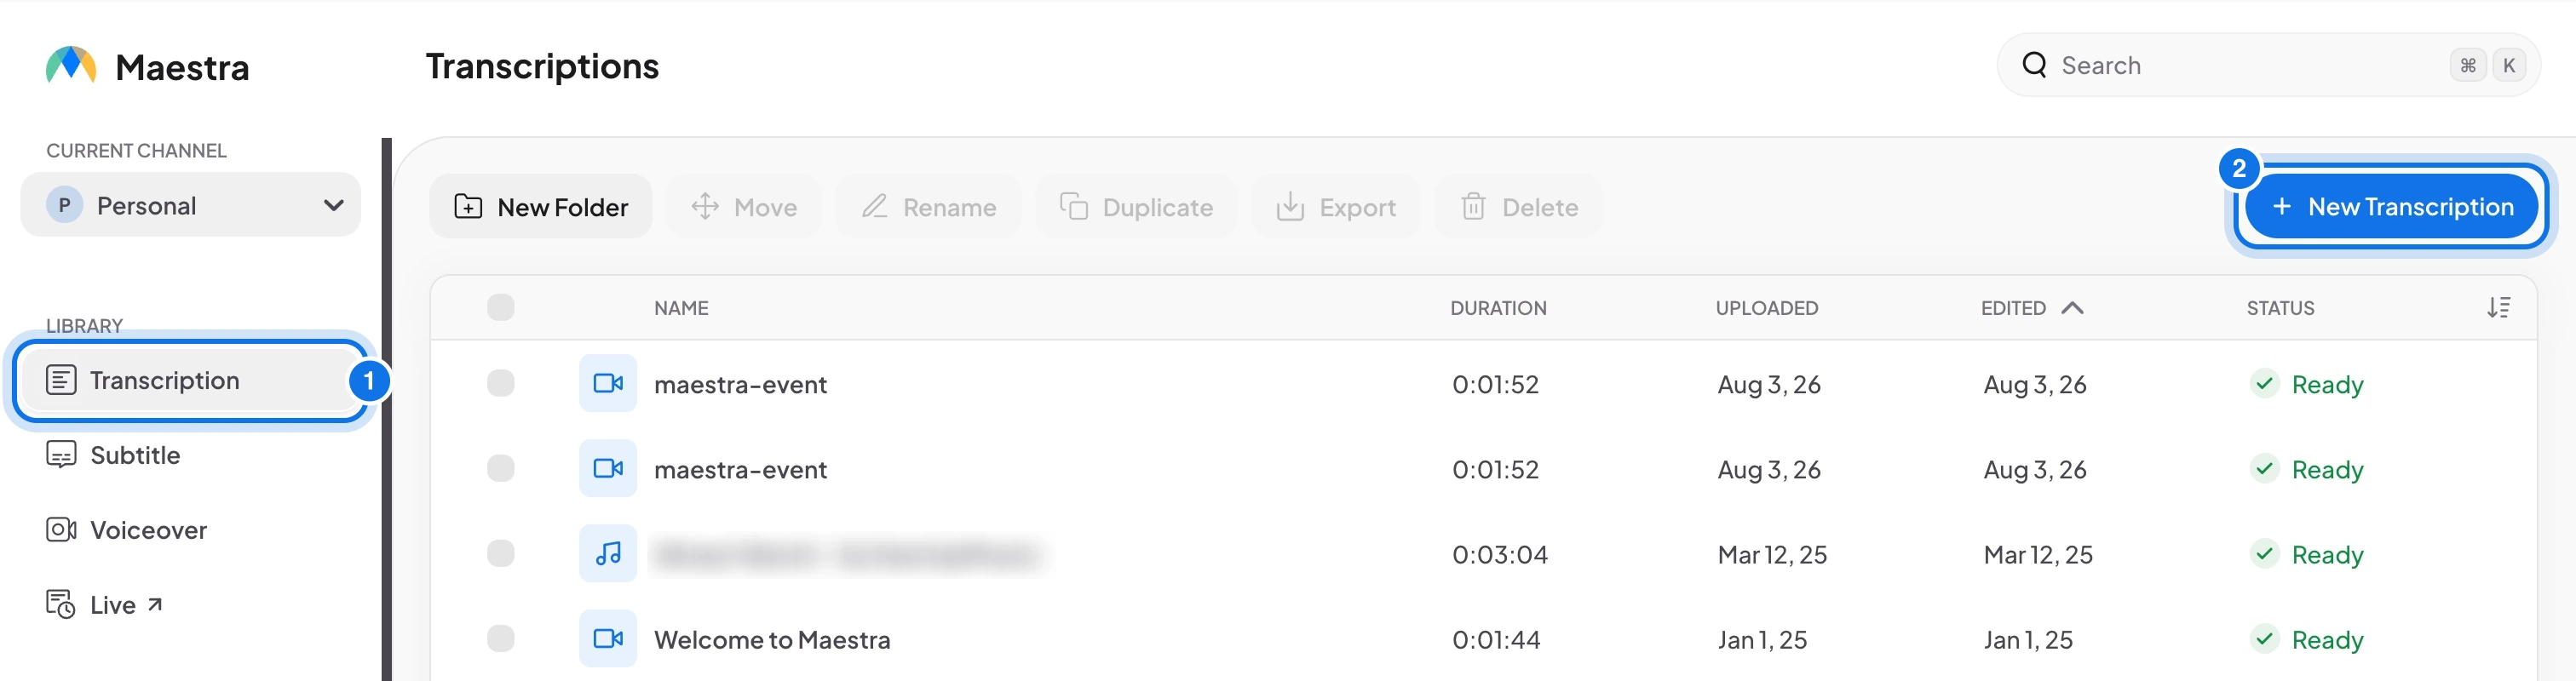
- In the left sidebar, under Library, select Transcription (marked 1 in the screenshot below). Your existing transcripts appear in the list, with the status of each one.
- Select New Transcription at the top right of the page (marked 2). The upload window opens.
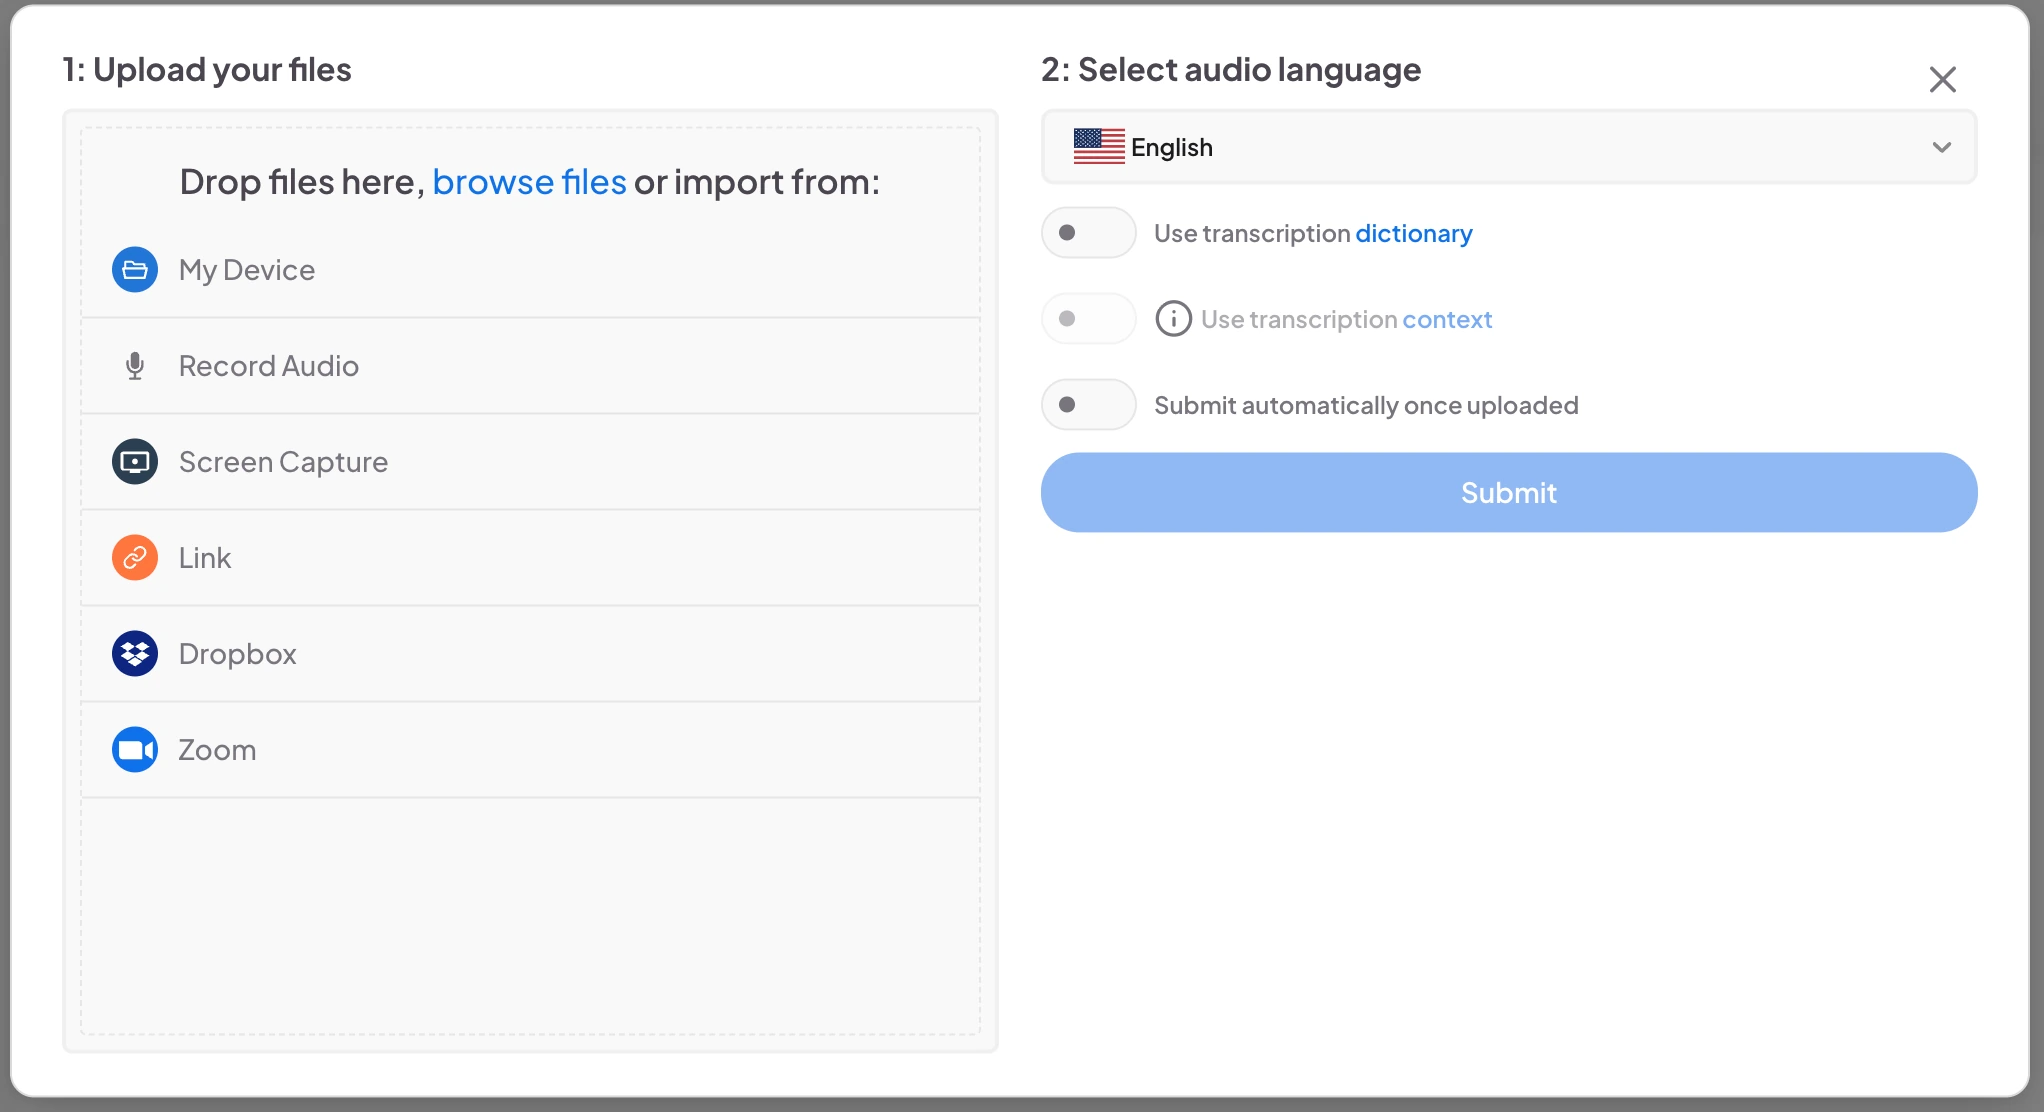
- Add your media in any of these ways:
- 3.1 Drag and drop a file into the window.
- 3.2 Select browse files.
- 3.3 Import from My Device, Record Audio, Screen Capture, Link, Dropbox, or Zoom.
- Under Select audio language, choose the language spoken in your file.
- Choose your upload settings (see the next section), then select Submit.
Choose your upload settings
- Use transcription dictionary: apply one of your custom dictionaries so names and specialized terms are transcribed correctly.
- Use transcription context: available when Soniox is selected as your transcription model in Settings.
- Submit automatically once uploaded: starts processing as soon as the upload finishes. If it is off, select Submit yourself when the upload is complete.
Open and edit your transcript
When processing finishes, the file's status in the Transcriptions list changes to Ready. Select the file to open the transcript editor. It shows the transcript with timestamps and speaker names next to the video, plus find and replace, text formatting, and notes in the Functions panel.
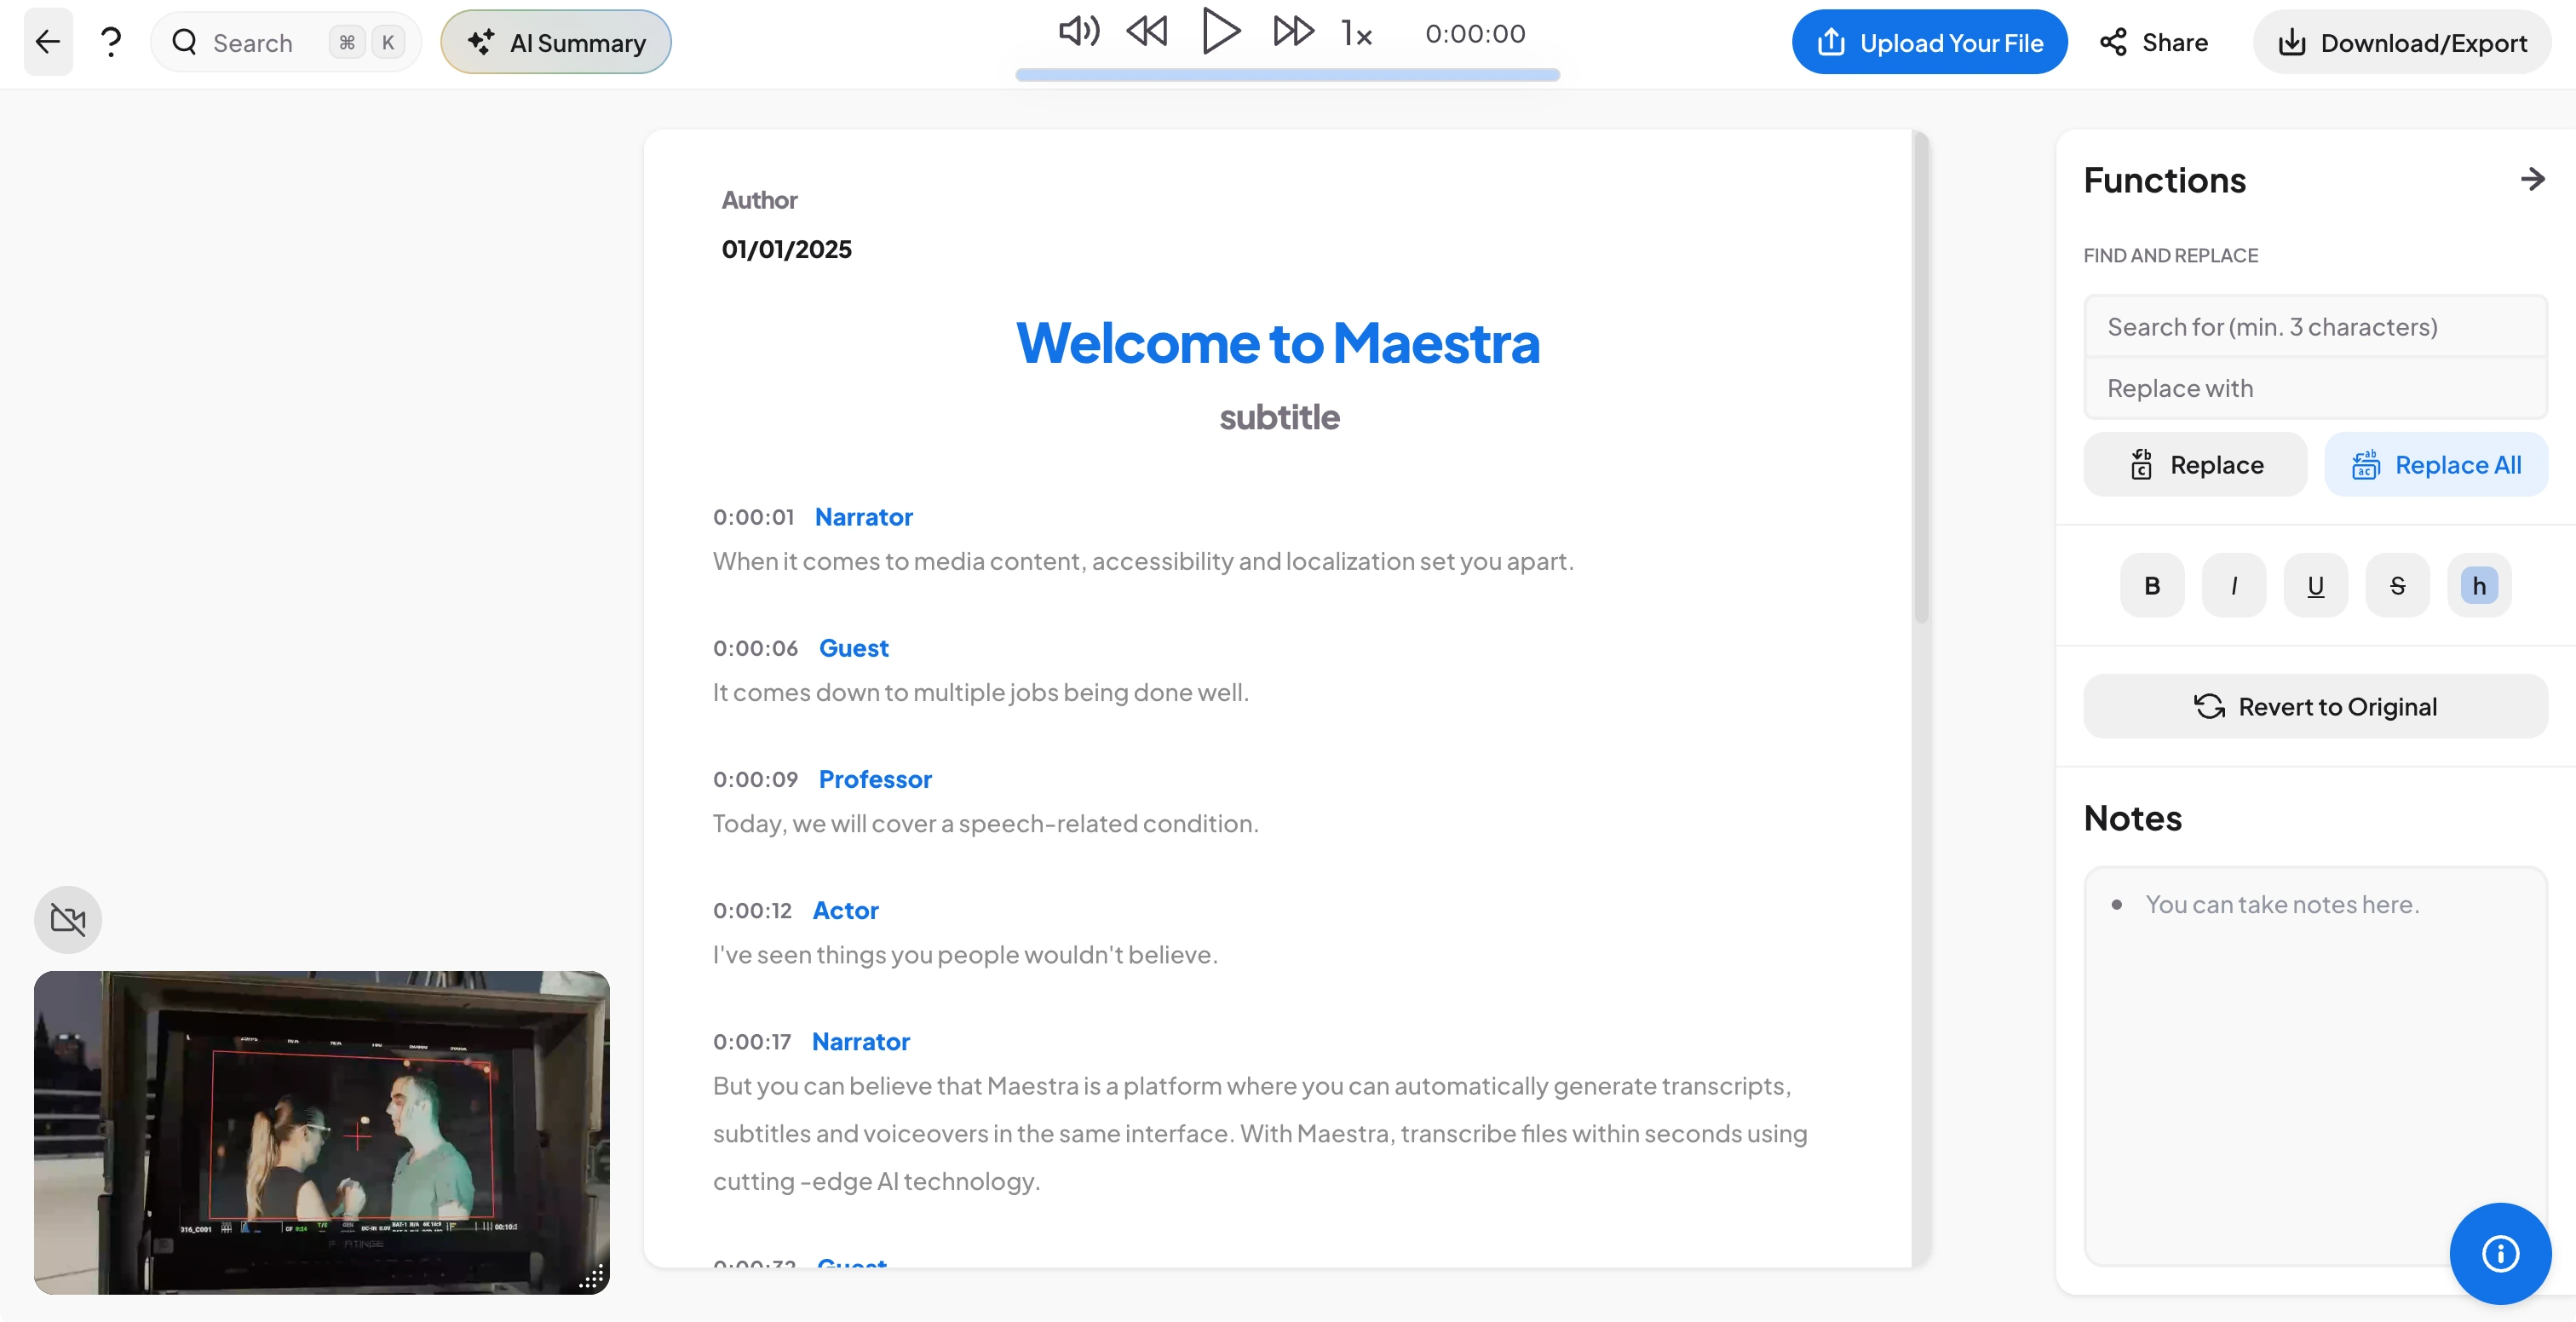
To learn what each tool does, read Transcription Editor. To save the finished transcript, select Download/Export at the top right of the editor.
Frequently asked questions
You can upload audio or video from your device, record audio, capture your screen, paste a link, or import from Dropbox or Zoom.
Yes. Maestra Studio labels speakers in the transcript, and you can rename each speaker in the transcript editor.
Create a custom dictionary, then turn on Use transcription dictionary in the upload window. Read the Custom Dictionary guide for steps.
In the Transcription list under Library. The status shows Ready when processing is complete. Select the file to open it in the transcript editor.
Yes. You can create translated subtitles from the Subtitle section. Read the Upload to Subtitle guide for steps.