How to Edit a Voiceover in Maestra Studio
The Maestra Studio voiceover editor lets you assign AI voices to each speaker, edit the text, generate the voiceover with AI Dubbing, preview each line, and balance the original audio against the new voice. Open any file from the Voiceover list to start.
What you need before you start
- A Maestra Studio account. If you do not have one, create a free account.
- A voiceover file with the status Ready. See Upload a File and Create an AI Voiceover.
- Credits for the dubbing. See Credits, Plans and Usage.
Know the editor layout
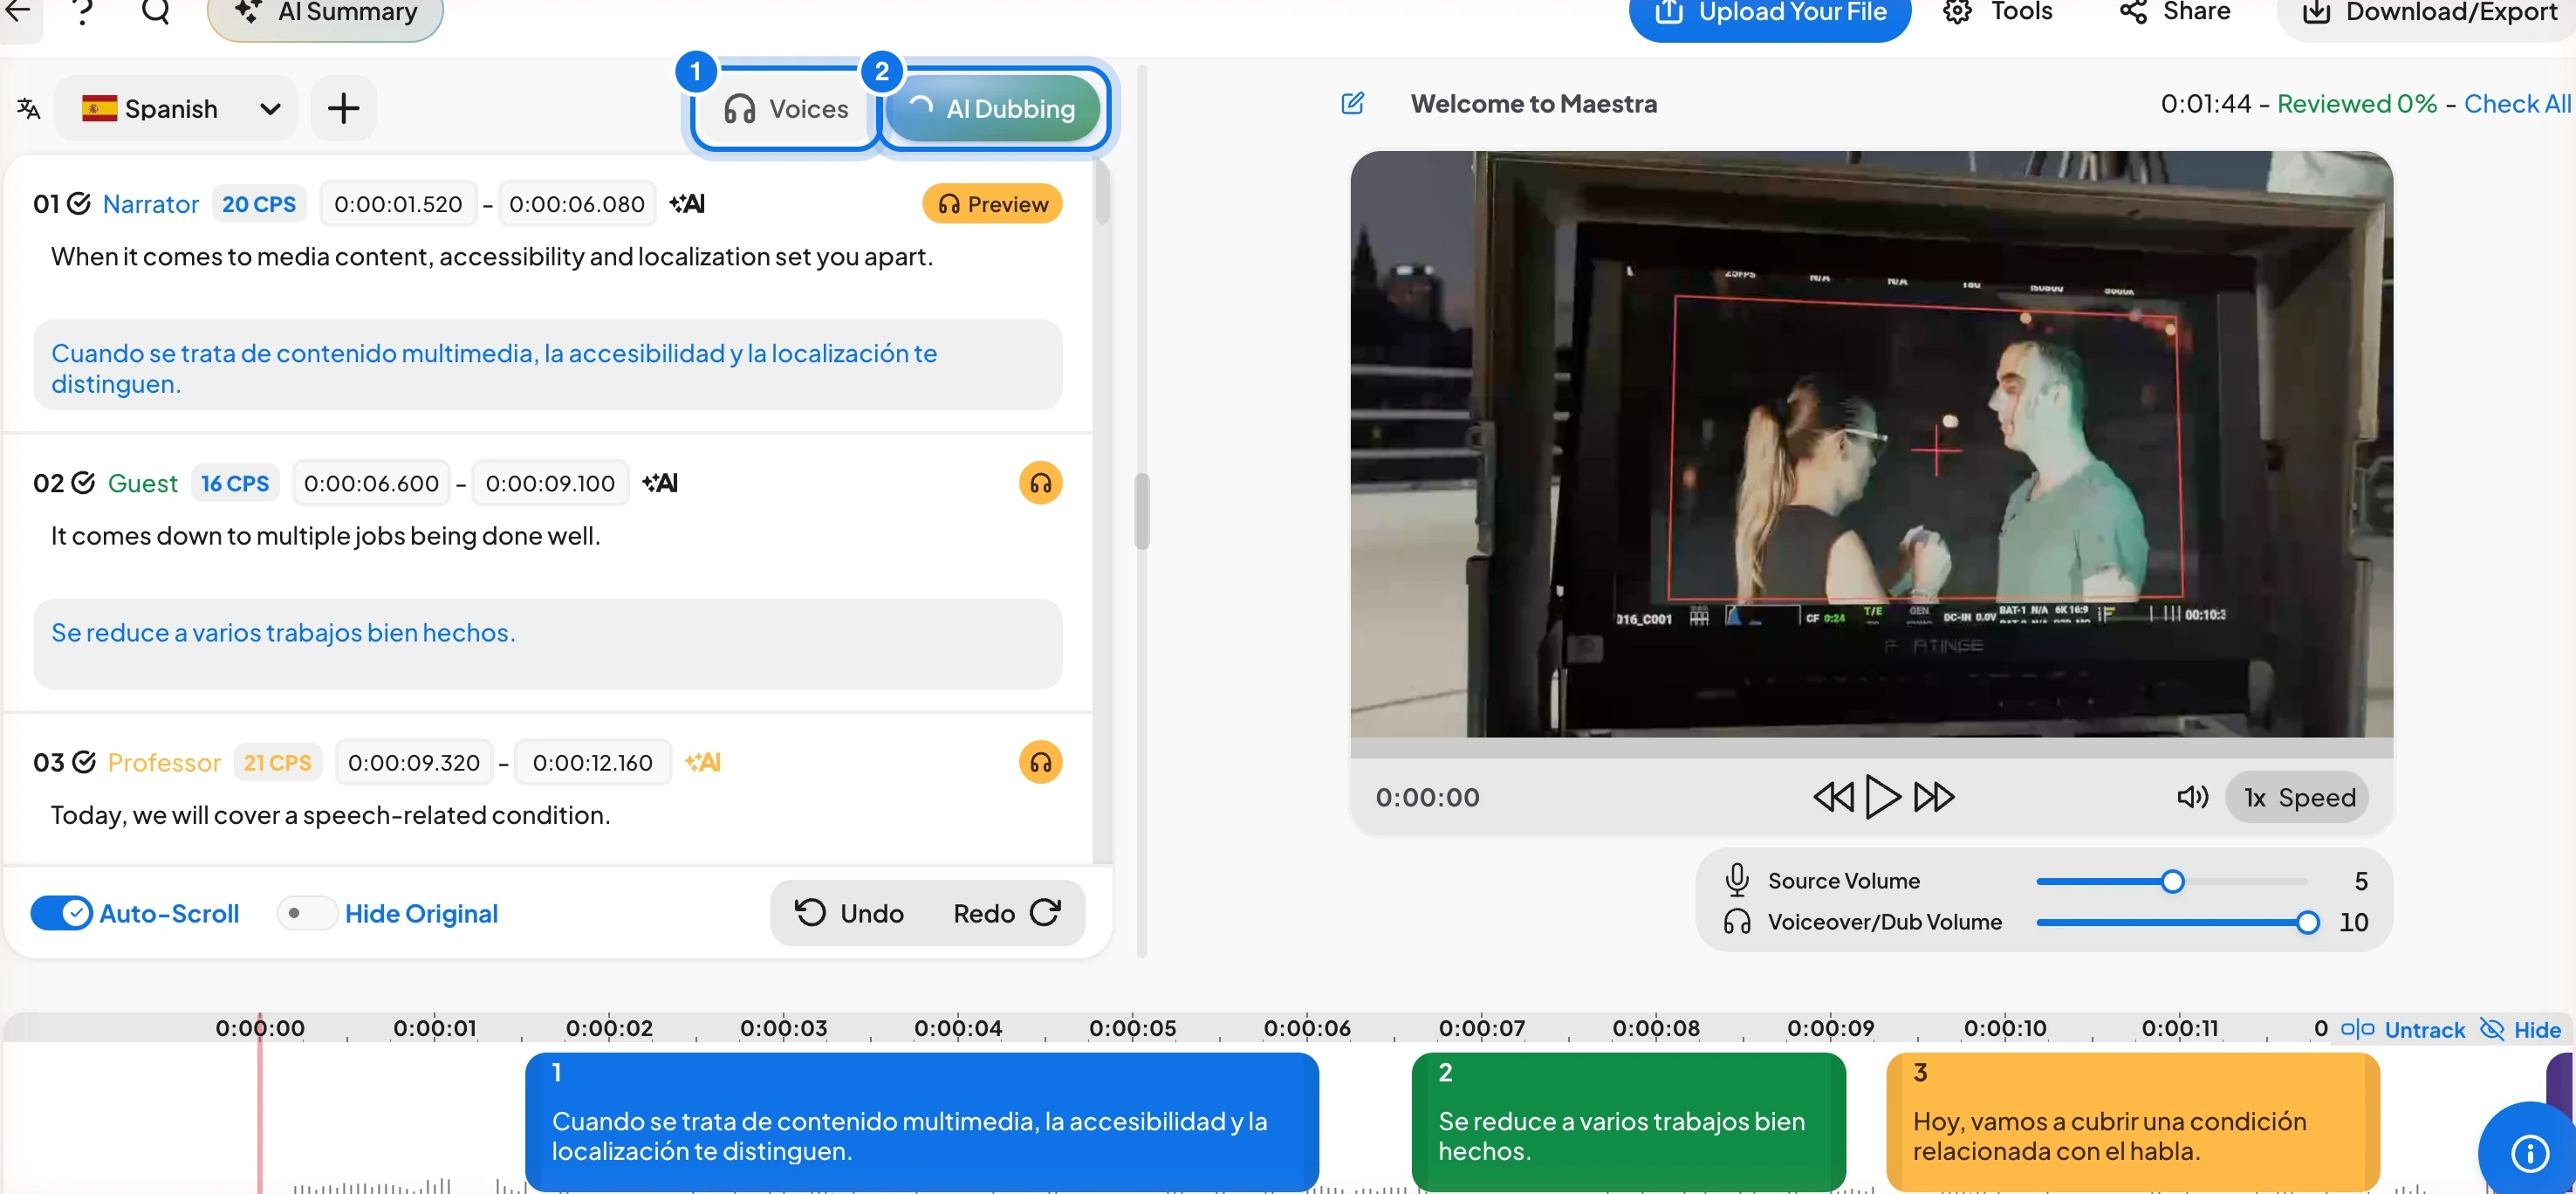
The numbered markers show the two buttons you use to cast and generate voices:
- 1: Voices, which opens the voice selection window
- 2: AI Dubbing, which generates the voiceover
Use the top bar
The top bar matches the subtitle editor: back arrow, ? for keyboard shortcuts, search, AI Summary, Upload Your File, Tools, Share and Download/Export.
Edit text, speakers and timing
The text panel works like the subtitle editor. Each line shows its number, speaker, a CPS badge, and start and end times. The original text appears first, with the translated text below it in blue. A high CPS number means the voice has to read fast to keep up, so shorten the text or lengthen the time.
Use the Tools menu
Select Tools in the top bar.
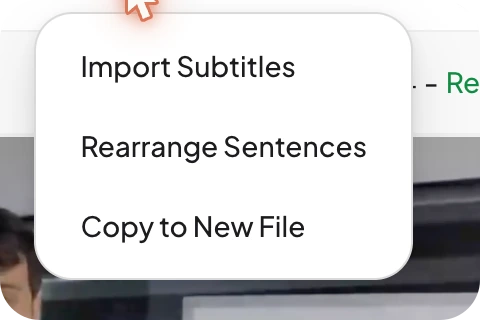
- Import Subtitles: brings in an SRT or VTT file. See Subtitle Importing and Translation.
- Rearrange Sentences: re-times the sentences to a reading speed you choose (see the next section).
- Copy to New File: saves a copy of your work in a new file.
Rearrange sentences
Select Tools, then Rearrange Sentences to re-time all sentences at once.
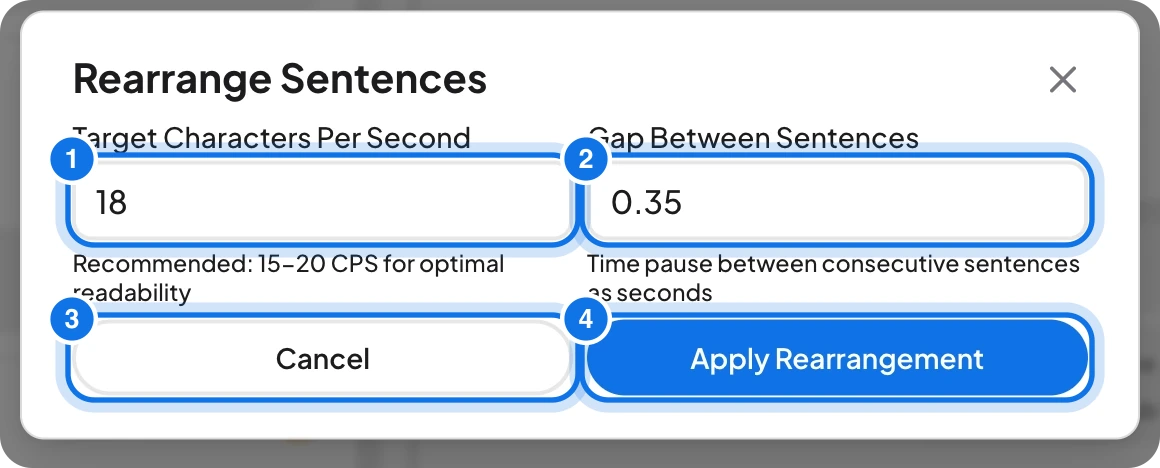
- Target Characters Per Second (marked 1): the reading speed to aim for. The window recommends 15 to 20 CPS for good readability, and starts at 18.
- Gap Between Sentences (marked 2): the pause between consecutive sentences, in seconds. It starts at 0.35.
- Cancel (marked 3): closes the window without changing anything.
- Apply Rearrangement (marked 4): applies the settings to the file. If you do not like the result, select Undo.
Assign voices to speakers
Select Voices to open Assign voices. The window lists every speaker in the file on the left, with the number of lines each one has, and shows progress as cast speakers (for example 4 / 4).
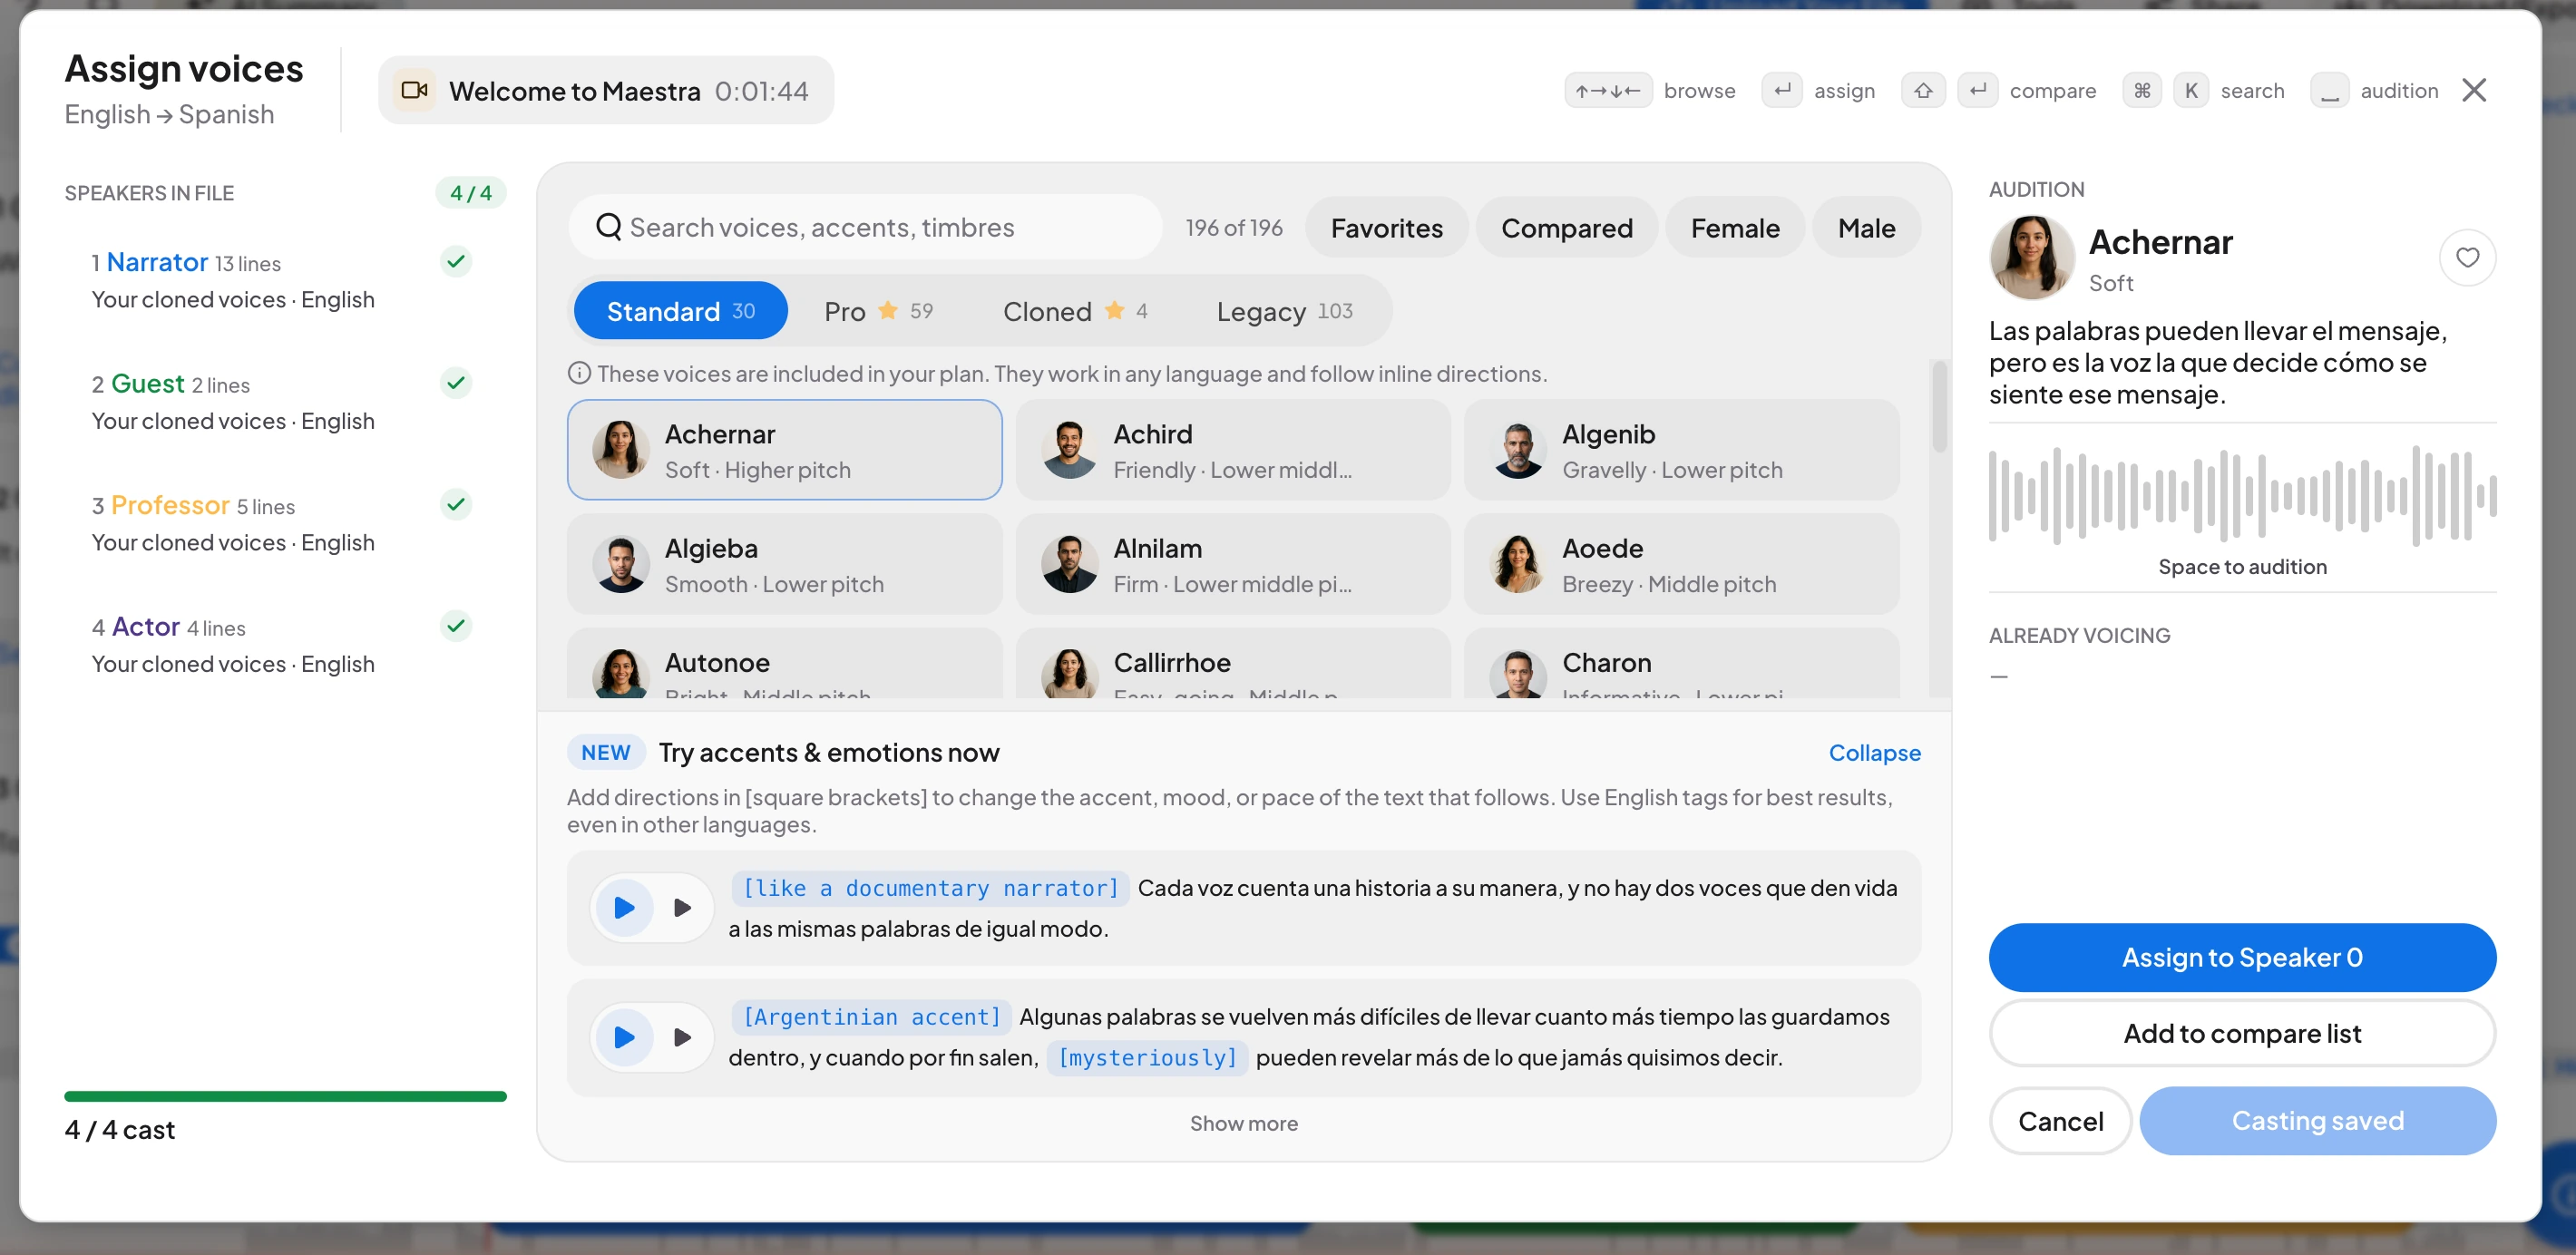
- Select a speaker on the left.
- Find a voice in the library:
- 2.1 Search by voice, accent or timbre.
- 2.2 Use the tabs to switch between Standard, Pro, Cloned and Legacy voices.
- 2.3 Use the filters (Favorites, Compared, Female, Male) to narrow the list.
- Select a voice to audition it in the panel on the right.
- Cast the voice:
- 4.1 Select Assign to Speaker to assign it.
- 4.2 Select Add to compare list to compare several voices side by side.
Standard voices are included in your plan and work in any language. Voices you cloned appear in the Cloned tab.
Direct accents and emotions
Add directions in [square brackets] before the text you want to change, to shape the accent, mood, or pace of that line. For best results, use English tags, even when the text is in another language. For example: [like a documentary narrator] or [Argentinian accent].
Generate and preview the voiceover
Select AI Dubbing to generate the voiceover. After you edit any line, generate again so the audio matches your changes. Use the play button on a line to listen to it, and use the player controls to watch the whole video.
Balance the audio
Under the video player, Source Volume sets the volume of the original audio and Voiceover/Dub Volume sets the volume of the new voice. Adjust both until the mix sounds right.
Export your voiceover
Select Download/Export at the top right of the editor. The Subtitle and Transcript tabs work as in the subtitle editor. The Media tab has the voiceover options.
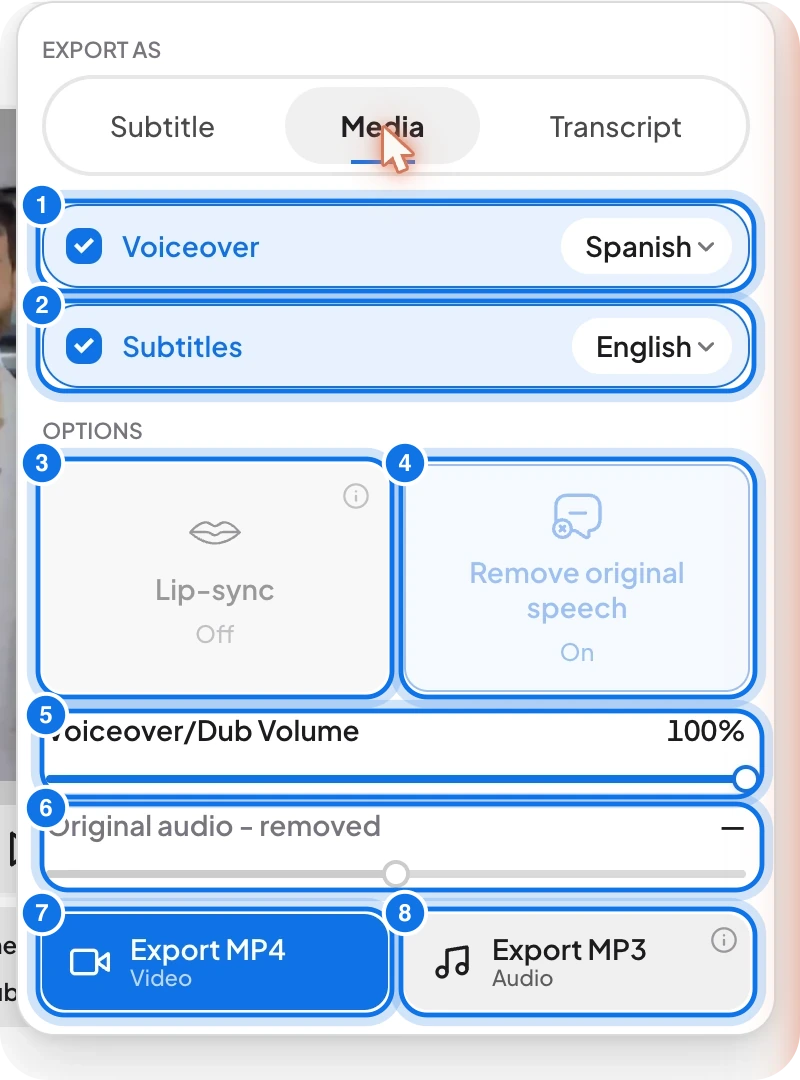
- Voiceover (marked 1) and Subtitles (marked 2): tick each one to include it, and pick its language.
- Lip-sync (marked 3): a switch that is Off by default. Hover over its info icon for the limit: lip-sync export is not available for files over 30 minutes.
- Remove original speech (marked 4): removes the original speaker so only the new voice is heard.
- Voiceover/Dub Volume (marked 5): sets the loudness of the new voice in the export.
- Original audio (marked 6): sets the loudness of the original sound. It shows removed when original speech is removed.
- Export MP4 (marked 7): downloads the video.
- Export MP3 (marked 8): downloads the audio only. The MP3 contains both the voiceover and the source audio, and the volume sliders set their levels.
On sample files, the export options are locked and cannot be changed.
Frequently asked questions
Yes. Select Voices, then pick a speaker and assign a voice to each one.
They are the groups in the voice library, shown as tabs in the Assign voices window. Standard voices are included in your plan and work in any language, and Cloned voices are the ones you created.
Put a short direction in square brackets before the text, such as [Argentinian accent] or [mysteriously]. English tags work best.
It re-times every sentence to a target reading speed in characters per second, with a set pause between sentences. Select Undo if you do not like the result.
Yes. After you edit a line, select AI Dubbing again so the voiceover matches the new text.
Use the Source Volume slider under the video player. The Voiceover/Dub Volume slider sets the loudness of the new voice.